HappyPaint — User Guide
A browser-based raster painting app inspired by Procreate & Krita: natural-media brushes, layers with blend modes, pressure/tilt input, and multi-touch gestures. This guide documents every tool and setting so you can get going without looking anything up elsewhere.
New here? Jump to Overview for the 60-second mental model, then Tools and Shortcuts & gestures.
Overview
Paint on a stack of layers with a chosen tool (brush, eraser, fill, …). Each layer is a GPU texture; the engine composites them through the viewport every frame. Documents autosave to your browser (IndexedDB) and can be saved as a portable .happypaint file, exported to PNG/JPEG, or interchanged as PSD.
First drawing in 4 steps: (1) open the gallery and click New drawing; (2) pick a size (plus paper, colour depth and a background colour — or a transparent canvas) and press Create; (3) choose a brush and color in the tool options row and paint with mouse, pen, or finger; (4) it autosaves — find it again in the gallery anytime.
Managing drawings: each gallery card has quick actions — Rename (pencil), Duplicate (copy), and Delete (trash) — so you can tidy up your library without opening a document.
Guided tour & What’s new: a short guided tour spotlights the toolbar, canvas, layers and status bar. It never interrupts you — start it (and re-run it) from the ? Help dialog, with “Take the tour”. Tapping the version number in the status bar (or the gallery footer) opens What’s new — a list of recent features and fixes with a button to check for the latest build. A small dot on the version appears when there are new changes you haven’t read yet.
“Still opening — reloading…”: HappyPaint updates itself whenever a new build ships, and a tab you left open for days can end up asking for app files that no longer exist. Rather than sitting there looking frozen, it now reloads itself once to pick up the new version, and lands on the screen you were heading for. Nothing is lost — your drawings live in this browser and are saved as you work. If the message comes back a second time, reloading the tab by hand is the fix.
About HappyPaint: the About HappyPaint link in the gallery footer — or Help ▸ About HappyPaint in the editor, or the About button in the ? Help dialog — opens a small panel with the running version (tap it to jump to What’s new), who built HappyPaint and who supports it, and credits for the artists whose paintings field-test the app. It also restates the privacy position: your paintings live in this browser and are never uploaded.
Coordinate spaces are explicit: screen pixels (what you touch) convert to document pixels (the canvas) through the viewport transform — so painting stays accurate at any zoom/rotation.
Workspace
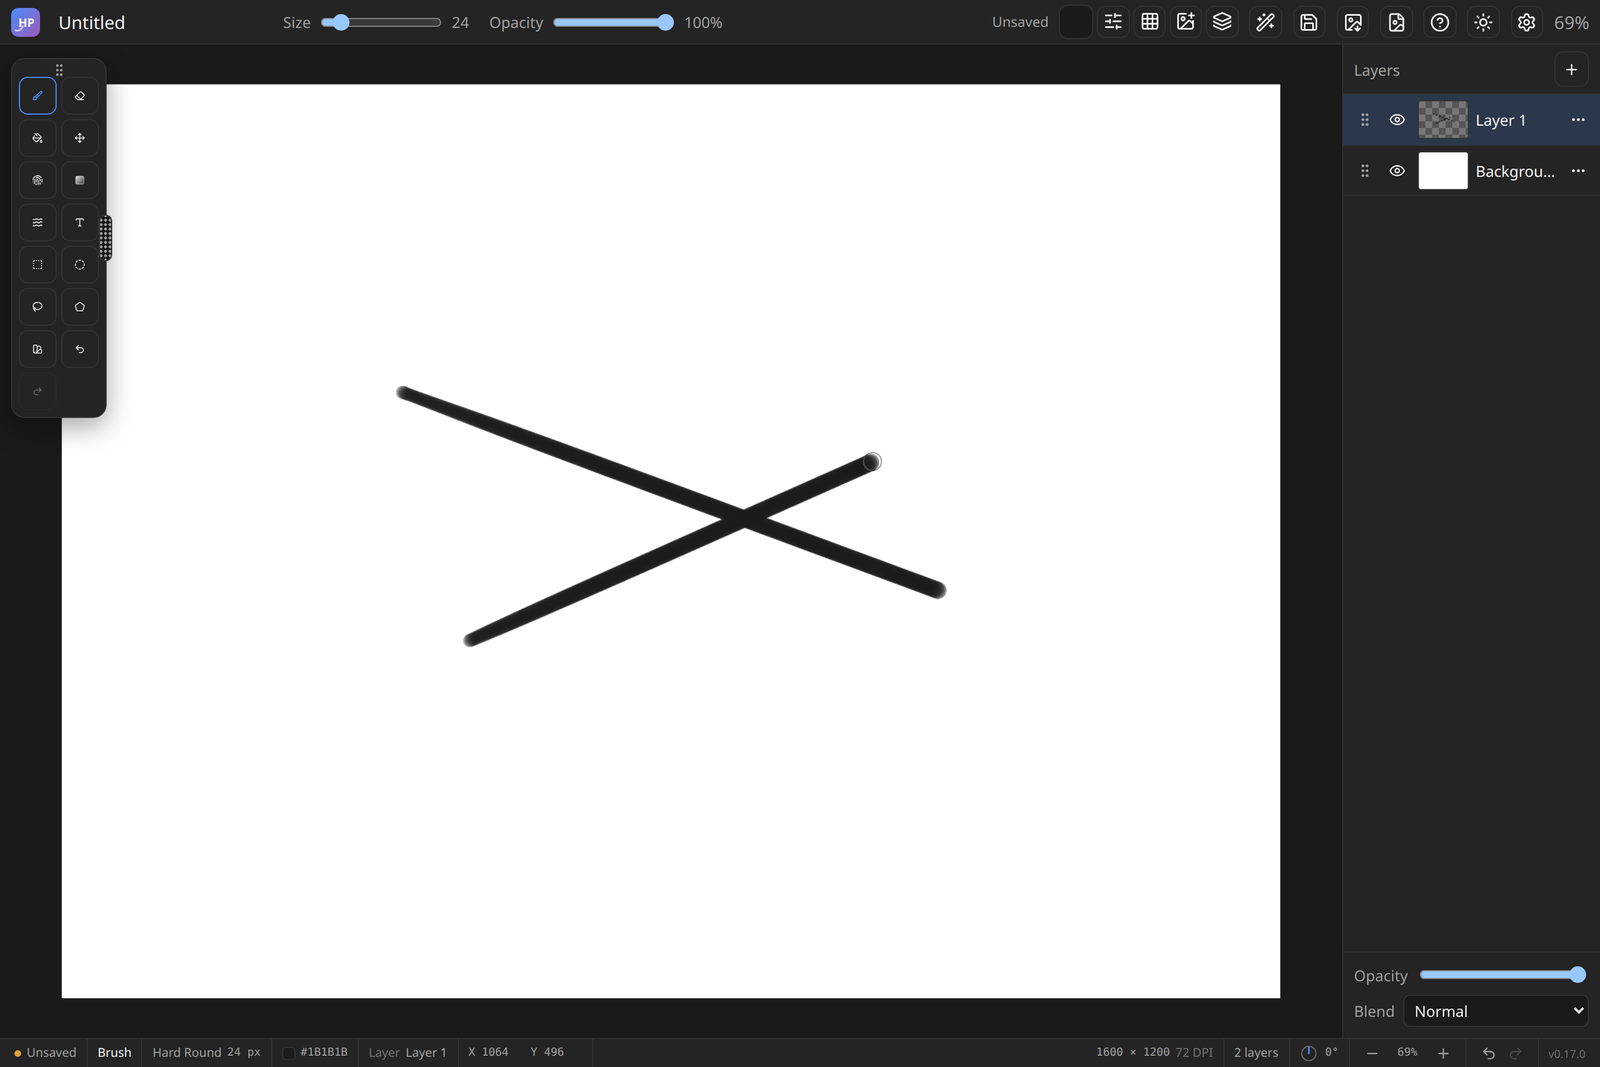
- Menu bar (top row) — the logo (back to the gallery), then the menus: File (gallery, save, Google Drive, export, insert image, paste image, camera), Edit (undo/redo, cut/copy/paste, copy or cut to a new layer, fill, clear, Settings), View (zoom and rotate, grayscale, print preview, fill mode, guides, rulers, symmetry, scrollbars, every panel, recording and replays, Zen mode, toolbar orientation, panel layout reset, theme), Image (canvas size, merge visible, flatten), Layer (new, duplicate, delete, group, merge down, clipping mask, alpha lock, lock, layer style, masks, fill layers, convert to paint), Select (all, deselect, invert, expand, contract, smooth), Adjust (every filter by category) and Help (shortcuts, tour, this manual, what's new, about). Each item shows its shortcut. Click a title to open it; while one is open, pointing at another title switches to it, and ← / → move between menus. The drawing’s name sits in the middle of the row; click it to rename. At the right: a red ● REC chip while recording (click it to stop), then the panel buttons Brushes (the brush library), Brush settings, Guides and Layers — words on a wide window, icons on a narrower one. The save state is in the status bar. On a narrow screen the menus fold into one ☰ button. In the desktop app on Linux and Windows this row is also the window’s title bar: drag any empty part of it to move the window, double-click it to maximise, and minimise / maximise / close sit at its right end. Other pages (the gallery, this manual) get a slim bar with the same buttons. On macOS the usual title bar stays.
- Tool options (second row) — the colour swatches first, then the brush (for painting tools: brush, angle, stabilizer, pressure), then whatever the active tool offers — selection mode and refine, fill tolerance and wash, transform buttons, shape kinds, pen modes, gradient type, mixer and liquify settings. Stabilizer is a switch (the slider keeps its strength), and Pressure has two: pen pressure drives Size, Opacity, both or neither for every brush. At its right end, the zoom: it shows the current zoom, and opens to Zoom in, Zoom out, Fit to screen and Actual size. It stays one line for every tool and scrolls sideways (swipe, or the mouse wheel) when it runs out of room.
- Tool dock — the drawing tools, pinned to the left edge as a rail by default (their settings are in the tool options row). Drag its top handle away from the edge to float it; double-click it (or the toggle) to flip vertical/horizontal; drag the dotted right-edge grip to change how many icon columns it shows. Drag it to the left or right screen edge to pin it as a rail (the canvas reflows around it); drag the handle away to float it again. Layout is remembered.
- Side sliders — Procreate's sidebar beside the canvas: brush Size on top (marked with a small and a big dot), the eyedropper square, Opacity below it (marked with two overlapping circles), then undo and redo. Hover a slider for its name. Drag a slider (a bubble shows the value); Size runs on a curve, so the small sizes get most of the travel. The square picks one colour and goes back to your tool. It stays put when you pan, zoom or rotate the canvas. Put it where you like (View ▸ Sliders: … or Settings ▸ Placement): on the left or right edge (right suits left-handed painting), across the top or bottom edge as a horizontal bar, floating anywhere over the canvas, or with the tools, inside the tool panel so it moves with it. On an edge, drag the grip to slide it along the edge (double-click the grip to centre it); pull the grip away from the edge and it comes loose and floats. A floating strip goes wherever you drag it, and double-clicking its grip turns it between vertical and horizontal. Placement is remembered. View ▸ Size & opacity sliders (or Settings) hides it. For an exact number, use the brush panel.
- Status bar — save state, active tool/brush, color, cursor position, document size + DPI + bit-depth (+ a “P3” badge on wide-gamut docs), layer count, rotation dial, zoom, and undo/redo. Click the size/DPI area to open Document properties.
- Layers panel — the layer stack with opacity, blend mode, masks, and per-layer actions. The layer menu's Metallic paint toggle turns a layer's paint into metal: flake glints and the paint's own colour tinting the reflection (gold paint glints gold) — and the shimmer moves as you rotate the canvas, like tilting a gilded page. Pairs beautifully with the thick Impasto/Oil brushes, whose ridges catch the light. A Metallic strength slider appears in the panel footer while it's on, and the color picker's Metals row has ready-made gold, silver, copper, bronze, rose gold, emerald and gunmetal base colours.
- Dockable panels — drag the Layers, Brush, Brushes & presets, Reference, or Color panel by its title bar to tear it off into a floating window, or drop it at the left or right edge to dock it there (Photoshop/Krita style). A docked color palette stays open while you paint — no reopening the popover per pick. Panels docked to the same edge stack vertically — e.g. Layers on top with the brush library below, both visible at once. While you drag, the edge lights up and an insertion line shows the exact slot the panel will land in. The divider between sections drags to rebalance their heights, and a dock's inner edge drags to resize its width. A floating panel resizes from any edge or corner, and remembers its size the next time it floats. The Color panel resizes in width only, and its picker grows with it. A wider brush library shows more columns. Sections work like an accordion: the chevron in a docked panel's title collapses it to a slim strip (click the strip to expand), and its space flows to the other panels. A floating panel folds the same way: its chevron (or a double-click on its title bar) shrinks it to just the title, where you left it, and the same again opens it at its old size. A docked brush library stays open while you paint — pick brushes without reopening it. Layout persists across sessions; More → Reset panel layout restores the defaults. (Compact/phone layouts keep their slide-in drawers instead.)
- Tabbed panels — drag a panel and drop it on another docked panel's header (its title row, or the tab strip if that side already has one) and the two join as tabs, the way Photoshop does it: the dock outlines itself and its headers light up while you hover, and the panel you dropped is the tab left showing. The same thing without a drag: with two or more panels docked to one side, a Tabs button sits at the foot of that dock. Either way they stop stacking and share a single tab strip, Photoshop style: one panel showing, the rest one click away. That gives the whole height of the side to whichever panel you are actually using — worth it for a long layer stack on a laptop. The icon at the end of the strip puts them back into stacked sections. Each side remembers its own mode and its own open tab. Stacked is still the better choice when you want to watch two panels at once, which is why it stayed the default.
In tab mode the strip is the title bar: the tab carries the panel's name and its ✕, and dragging a tab tears that panel off — or docks it at another edge — exactly as dragging its title bar does. The panel's own title row then drops whatever the tab already says and keeps only its real controls, so the Layers panel still has its search, ⋯ and add-layer buttons while a row that held nothing but a name disappears. Close panels down to one a side and the strip stands back down to a plain section. - Floating panels into each other — the same tab arrangement without a dock. Drag a floating panel and drop it on another floating panel's title bar: the title bar lights up while you hover, and on release the two become one floating window with a tab each, the panel you dropped showing. Drop more panels on that window's tab strip to add them. Drag a tab out to float that panel on its own again; when only one panel is left the group dissolves and that panel stays where the group was. Drag the strip's empty space to move the whole window; its chevron (or a double-click on the strip) folds it to the strip, and its ✕ closes every panel in it. A closed tab keeps its place: open that panel again and it comes back in the group. Groups are remembered between sessions. Only real floating windows join — the colour picker once dragged off the toolbar, Brush once floated, Layers once torn off its dock; on a phone each panel keeps its usual phone form.
- Pick up where you left off — each document remembers its working state: zoom/pan/rotation, active tool and layer, the brush (with your tweaks) and color. Reopen the document and the canvas looks exactly as you left it. Open docked panels come back too. New documents start with your last-used tool, brush and color (instead of factory defaults) — new canvas, same brush in hand.
- Zen mode — Tab (or a four-finger tap) hides all chrome for a full-screen canvas; a floating button or the same gesture brings it back.
Canvas & navigation
Pan, zoom, and rotate at any time; painting always maps to document space.
| Zoom | Pinch, Ctrl/⌘+wheel, +/− keys, or the status-bar buttons (5%–6400%). |
| Pan | Two-finger drag, scroll wheel, the Pan tool (H), holding Space with any tool, or a middle-mouse drag. |
| Scrollbars | On a desktop, thin bars along the bottom and right of the canvas appear once you zoom in past the window. The thumb shows where you are over the document: drag it to pan, or click the track to jump most of a screen that way. You can scroll a little past each edge, so any edge can be brought toward the middle. They work at any rotation and hide when the whole document fits. View ▸ Scrollbars turns them off (remembered). |
| Rotate | Two-finger twist, Shift+wheel, Ctrl+[ / Ctrl+] (15° steps), or the status-bar dial. Snaps near 0/90/180/270°. |
| Fit / 100% | Quick pinch-in, or 0 (fit) and 1 (100%). |
| Reset rotation | 5, click the rotation dial, or double-click its degree label. |
| Grayscale view | Ctrl+Y (or the status-bar contrast toggle) shows the artwork in grayscale to check values — non-destructive: your layers and exports stay in colour. |
| Print preview | View → Print preview (CMYK proof) shows your artwork as the press prints it: separated into C/M/Y/K inks with realistic (impure) ink colours and dot gain, then printed back. Colours the press can reach are left alone — a muted sky or a skin tone should barely move — and only genuinely unprintable ones shift, which is what makes the preview worth trusting. Saturated screen greens and blues are the ones that dull. Non-destructive: toggle it off and the screen is back to normal. |
| Proof options | Under Print preview, once it is on. Press names the press being simulated — the built-in generic coated model, or click to load your own .icc. Simulate paper white tints the whole preview with the stock’s own colour, and Simulate black ink shows ink black as the dark grey it really is instead of screen black. Both are off by default (as in other proofing apps): they make the preview look washed out, which reads as a broken preview rather than as information. Turn them on when you want the absolute rendering — what the printed sheet will look like next to your monitor. |
| Non-printable colours | View → Non-printable colours paints every pixel the press cannot reproduce in flat red — the gamut warning proofing apps show. Click again to tighten the threshold from ΔE 5 (visibly different) to ΔE 2 (strict), and once more to turn it off. It works with or without Print preview: the preview shows what a colour becomes, this shows where the press had to move it. |
| View menu | The menu bar's View menu holds everything that changes how you see the work, not the pixels: zoom and canvas rotation, Grayscale, Print preview (with its press and proof options), Non-printable colours and Fill mode; a Guides section (show guides, rulers, edit guides, measure, symmetry mirrors and their axis, scrollbars); a Panels section (Layers, Properties, Brush settings, Reference, Align & distribute, Animation); Capture (record, screen capture, replays); and Workspace (Zen mode, toolbar orientation, reset panel layout, theme). Pixel-changing filters are in Adjust. |
| Transparency | Transparent areas show a checkerboard so you can see the canvas bounds. |
Tools
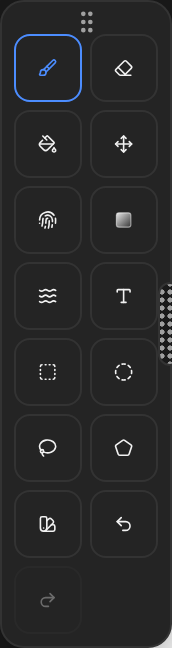
A tool decides what a stroke does on the active layer. The brush, eraser, smudge and mixer tools all paint through the brush engine, but each keeps its own brush — preset, size, opacity and all — so choosing a proper eraser never disturbs the brush you were drawing with. The other tools have their own options, described below. Hover any tool or control with a mouse or pen to see its name and shortcut.
| Brush (B) | Lays down the current color with the active brush preset. Pressure and speed drive size/opacity so lines taper naturally. |
| Hold E | Temporary eraser. Hold E, erase the stray line, let go and you are back on the pencil — no round trip through two keypresses. Tapping E still latches the eraser as before; the difference is whether you held the key (or drew while it was down). |
| Eraser (E) | Same brush mechanics, but removes pixels (paints transparency) instead of colour — soft brushes erase softly. It keeps its own brush, size and opacity: pick a different eraser, size it up, take it to 100% to wipe an area, and the brush tool is left exactly as you had it (brush, eraser and smudge each remember their own, saved with the document and carried into new drawings). |
| Choosing an eraser | Open the brush library with the eraser active and it shows the Eraser brushes only — one panel that changes with the tool, so you never scroll past ninety painting brushes hunting for an eraser. Six of them: Hard (flat, grainless, full flow — one pass clears completely), Soft (feathered, for blending an edge back), Square Hard (clears into a corner with no scalloped edge — the classic block eraser), Square Soft, Spatter (breaks an edge into flecks, for distressing rather than clearing) and Textured (grainy and short of full flow — a kneaded-eraser feel for lifting tone off charcoal). Tap “All brushes” for the full library: any brush works as an eraser if you want its exact texture, and that choice sticks to the eraser alone. Why the default matters: erasing with a textured painting brush like the Pencil removes only part of the alpha per dab and leaves speckle in the grain, so a mark takes three or four passes to clear. |
| Fill (G) | Flood-fills a connected region with the current color. Tolerance controls how different a neighbouring pixel can be and still be filled; “Grow” expands the fill a few px to tuck under anti-aliased outlines (no 1px halo). Two modes ride the same tap: Tone (a screentone, see Manga) and Wash. |
| Fill → Wash | Tick Wash on the Fill tool and a tap floods the area with a live watercolour wash instead of flat colour. It spreads out from where you tapped, around anything in the way, then blooms, granulates into the paper and dries like a brushed wash, as one undo step. It stays inside the area: the wash will not bleed past the line art you filled, while it is wet or after. Tick Water only to wet the area with clear water instead, then paint into it with a Live watercolour brush: the colour blooms out softly across the wet area (damp paper gives wide blooms, soaked paper soft glows) and stops at the area’s edge — wet-in-wet. Water sets how wet it is (wetter spreads and blooms more), Pigment how strong the colour is, Graded fades it out towards the far side of the area (a classic graded wash), Soft feathers it inside the edge and Speed sets how fast it spreads. All layers (on by default) finds the area in everything you can see, so you can tap an empty layer above your line art. Wash paints in the current colour on the active layer; brush strokes can join it while it is still wet. |
| ColorDrop | Drag the status-bar colour swatch onto the canvas to flood-fill; pause to lock the seed, then slide to set the threshold live, release to commit. |
| Fill mode (F) | A brush modifier (brush panel / status bar / press F): the stroke fills its closed silhouette with flat colour — draw a loop, get a filled shape. It fills at the brush Opacity, so a translucent fill stays translucent and overlapping shapes build up; edges are anti-aliased. Live preview at that same opacity; commits on release; self-crossing scribbles fill their pockets (even-odd); honours Symmetry and alpha lock. |
| Move / Transform (V) | Repositions, scales, rotates and flips the whole layer — or just the selected pixels if there’s a selection. Corner handles scale uniformly, the side bars stretch one axis (Shift keeps the aspect ratio, Alt scales from the centre), the top handle rotates, and dragging a side handle past the far side mirrors. Shift while dragging the layer itself snaps the move to horizontal / vertical / 45°. Moving art past the edge of the canvas never deletes it: the part outside is kept (hidden) and comes back when you move the layer back, or when you make the canvas bigger. The transform box reaches out over it, so you can always see how big the layer really is. On a tablet, the Uniform and From centre buttons in the options row are the sticky, keyboard-free versions of Shift and Alt. The toolbar adds Flip H, Flip V, rotate ±15° and scale ±10% buttons, plus Distort & Warp modes (see Selections & transform). Enter applies, Esc reverts. Ctrl/⌘+T selects the tool in the installed app; in a browser tab that shortcut belongs to New Tab and cannot be intercepted, so use V. |
| Pan (H) | Drags the canvas around — no pixels are touched, so it works on any layer (including text and path layers, where painting is blocked). Hold Space with any tool for a temporary pan, or drag with the middle mouse button; the wheel and a two-finger drag pan too. |
| Smudge (S) | Picks up paint under the brush and drags it, smearing colors into each other (blending, soft shading, hair/fur). Strength sets how much it pulls. It smears with its own brush, the way Procreate’s Smudge does: pick a brush while Smudge is active and your painting brush is untouched. A soft brush blends softly, a hard brush drags a crisp edge, and a textured brush (Bristle, Chalk, Spatter…) leaves its texture in the smear. Pen pressure changes its size and strength as the brush’s pressure settings say. |
| Mixer brush (Shift+B) | Photoshop’s Mixer Brush: it paints your colour AND picks up the colour already on the canvas, mixing the two as you drag (pigment-style, so blue into yellow goes green). Its options sit in the tool options row. The preset menu at the top holds Photoshop’s combinations — Dry, Moist, Wet and Very Wet, each with a light and heavy variant — and sets the three sliders in one pick; move a slider and it reads Custom. Wet is how much canvas colour it picks up and drags. Load is how much paint is on the brush; it runs out along the stroke. Mix is canvas colour vs your colour in what goes down (100 = all canvas). They belong to the tool, not the brush, so any brush can mix: its tip, size, opacity, hardness and pressure still apply, and a textured brush mixes with its texture. Keep colour (the pin) makes the brush hold the colour it picked up from one stroke to the next, like a dirty real brush. Picking a new colour, or Clean (the brush icon), loads fresh paint. With Keep colour off, every stroke starts clean. Load from the canvas: Alt-click (or press the swatch in the strip, then tap the canvas — the tablet way) and the brush loads the whole brush-sized area under it, not one colour, like Photoshop’s multi-colour load. Sample a gradient with a 100 px brush and the stroke paints that gradient back across its width. The swatch shows what the brush holds. It loads what you see (all layers), keeps the orientation it was taken in, and reloads at the start of every stroke — Photoshop’s “Load the brush after each stroke” — unless Keep colour is on. Picking a colour or Clean unloads it. Like Smudge, it keeps its own brush. |
| Gradient | Drag a line to lay a gradient; the drag sets its direction and length, and anything past the end is solid. The tool options row has two dropdowns: what the drag makes, Pixels (painted into the layer) or Fill layer (an editable gradient layer, see Fill layers), and the shape: Linear ramps along the drag; Radial makes circles around where you started; Angle sweeps around the start point, beginning along the drag; Reflected mirrors the linear ramp behind the start point; Diamond makes a square on its corner, a corner pointing where you let go. Its colours are in the Colour panel, which shows a Gradient section while the tool is active (the sliders button in the tool options row opens it, wherever the panel is docked or floating). The stop bar: click it to add a stop, drag a stop to move it, double-click it or use the bin to delete it (a gradient keeps at least two). The diamonds above the bar are midpoints: drag one to move where its two colours are half and half, double-click it to centre it. Each stop takes its colour from the foreground (Fg, marked F on the handle), the background (Bg, marked B) or its own colour, and has its own opacity, so a stop at 0% fades out. Fg and Bg stops follow the header swatches, so X, which swaps them, flips the ramp. Presets: Foreground → Transparent and Foreground → Background are built in (the same two Photoshop puts first); + saves the current stops as a preset of your own, and × on one of yours deletes it. Presets and the current gradient are remembered between sessions. Reverse paints it the other way round without re-dragging. With a Gradient fill layer selected, the section and the tool options row edit that layer instead. Confined to the selection if one exists. |
| Liquify | Warps existing pixels like wet paint — Push shoves them along the drag, Twirl swirls, Pinch/Expand pull in or push out, Reconstruct eases them back. Size sets the radius; Strength the intensity. |
| Text (T) | Editable, resolution-independent text layers (see the Text section). |
| Pen (P) | Draws editable vector paths (a path layer, re-strokeable with any brush). Two modes (the Anchor | Curve pill in the options row): Anchor — click to drop corner points, click-drag for smooth Bézier curves; Curvature — just tap a series of points and a smooth curve is fitted through them. Finish the path the same way in both modes: click back on the first point to close it, double-tap (or press Enter) to finish it open, Backspace removes the last point, Esc cancels. Options: Fill the closed path, Snap anchors to the grid/guides, Constrain handles to 45° (the keyboard-free stand-in for Shift), and a tablet edit mode (move / add / delete / corner⇄smooth points). Convert to paint layer to bake it to pixels. |
| Shape, Path or Pixels | The dropdown at the start of the Pen options, as in Photoshop. Shape (the default) makes a path layer drawn with the current brush, plus Fill if it is on. Path makes a bare “Work path”: an editable outline with no stroke and no fill, shown as a thin blue line while its layer is active, and there to be used by the path operations below. Pixels paints the finished path straight onto the active paint layer, like a perfectly steady hand-drawn stroke (and fills it, with Fill on) — no path is kept. |
| Path operations | Right-click the canvas with the Pen (or the Path ▾ button in its options, or a path layer’s ⋯ ▸ Path operations…): Make Selection turns the path’s area into the selection. Fill Path fills that area with the current colour. Stroke Path… traces the path with the Brush, Eraser, Smudge or Mixer Brush, using the current brush with no smoothing — tick Simulate Pressure to taper both ends like a pen stroke (the brush’s own pressure settings decide whether that thins it, fades it or both). Create Vector Mask masks the layer with the path’s shape as a vector mask — kept as paths, so it stays crisp at any zoom and follows the layer’s transforms; it replaces a vector mask the layer already has, and a pixel mask stays alongside (see Layers ▸ Masks). The path itself stays, so you can adjust it and make the mask again. Free Transform Path switches to the Move tool, which moves, scales, rotates and flips the path itself — it stays an editable path. Delete Path removes it. An open path is closed with a straight line for the area operations, as in Photoshop. |
| Which layer gets the pixels | Fill, Stroke and Vector Mask act on the paint layer directly below the path layer — the menu says which one. With no paint layer there, Fill and Stroke (Brush) make a new layer; the Eraser, Smudge, Mixer and the mask need one to act on. The path stays active afterwards, so you can fill and then stroke in a row. |
| Shape (U) | Drags out a clean line, ellipse, rectangle or regular polygon (3–12 sides), stroked with your current brush — so the shape keeps the nib’s texture. Shift constrains (45° line, circle, square, 15° polygon steps), Alt draws from the centre, and the bucket toggle fills the shape underneath the outline. The shape stays editable after you lift — resize, rotate or drag a vertex — until Enter or a tap off it commits. See Shapes for the full rundown, and for QuickShape, the freehand gesture that does the same job. |
| Selections | Rectangle (M), ellipse, lasso (L), polygon, and magic wand (W). Everything outside the selection is protected. |
| Eyedropper (I) | Samples the colour under the cursor exactly as you see it — impasto relief and paper tooth included — with a Procreate-style loupe showing old/new. Three ways in: the toolbar pipette (or I) latches it as a tool, so a press-and-drag on the canvas samples with no modifier at all (the tablet-friendly route); Alt+drag (mouse/pen) or touch-and-hold (finger) samples without leaving the tool you’re painting with. Drag to hunt for the exact pixel — the colour updates live and lands in Recents when you lift. |
Brush engine
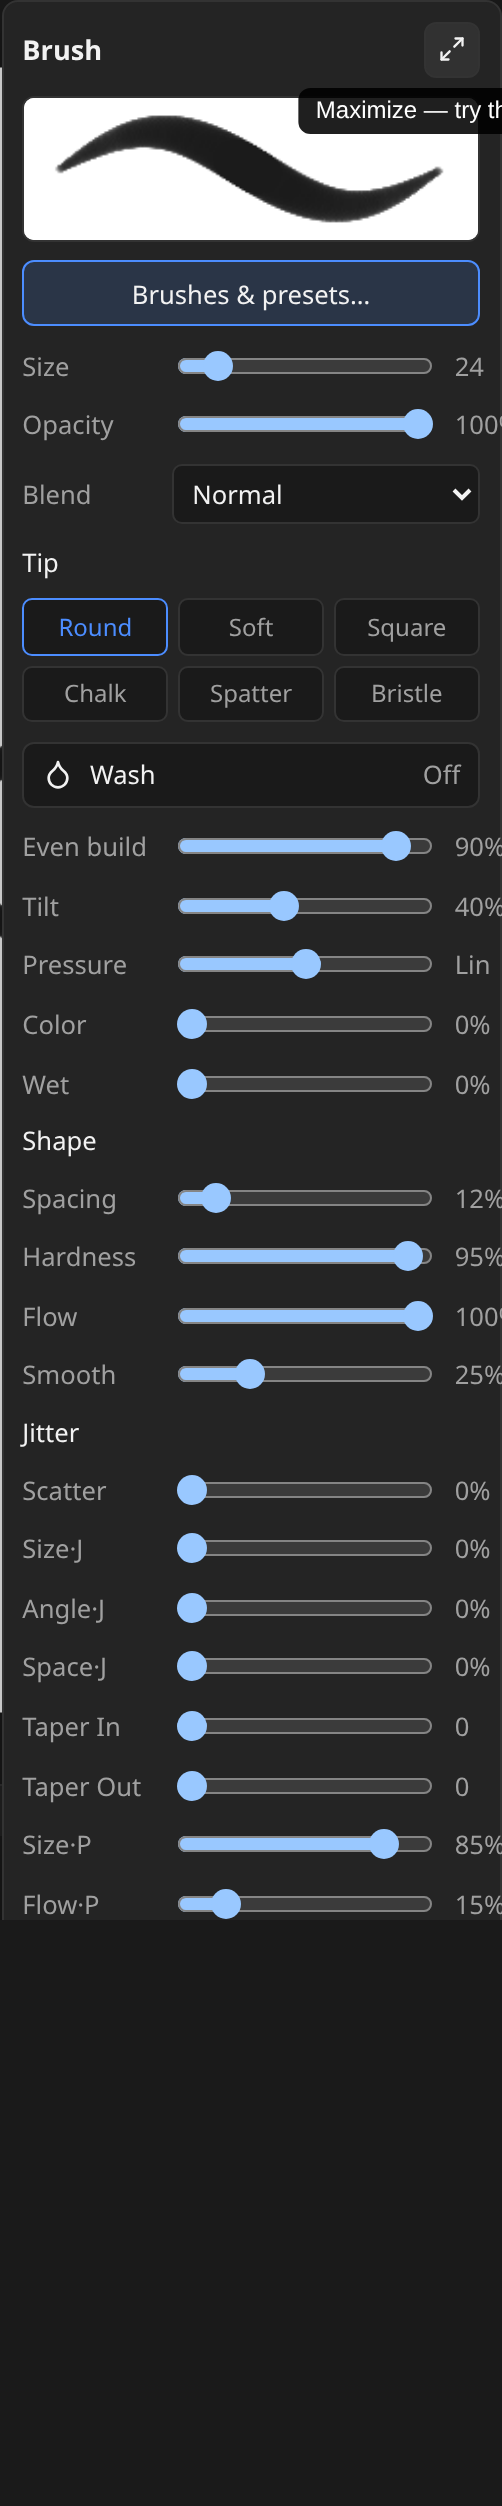
A stroke is drawn by stamping the brush tip repeatedly along its path; dynamics (pressure, speed, tilt) modulate each stamp’s size, flow and shape. Brushes are just data presets, so every preset is a starting point you can tune and save as your own. Open the brush panel with Brush settings in the top row to adjust the active brush; the Library button holds all presets and your saved brushes.
The top strip keeps the everyday controls in reach while a brush, eraser, smudge or shape tool is active. The library button shows a sample stroke and the name of the current brush, so you can tell which one is loaded without opening a panel. It shows the brush as saved; tweaks you make in the brush panel are not drawn into it. Next to it sit Size, Opacity, Angle and the Stabilizer, each a slider with a number you can click and type into. Angle turns the brush tip, the same setting as Angle in the brush panel; Shift+[ and Shift+] turn it 15° while you paint. It is dimmed on a Mixer-style wet brush (Wet above 0), whose mixer ignores it; Live watercolor and oil brushes use it. The Stabilizer slider is its own on/off switch: drag it above 0 to turn it on at that strength, or to 0 to turn it off. The curve button beside it toggles it and remembers the last strength.
Brush groups
The library opens with your own groups above the built-in categories. Favourites is there to start with. Use groups as a shelf for the brushes you actually reach for, such as an ink, a pencil and a texture from three different categories.
- Add a brush: drag it from any category (or from your saved brushes) onto a group. On a tablet, press and hold the brush first; a plain swipe still scrolls the list. Or tap ⋯ on the brush and pick Add to …, which puts a tick next to every group it is already in.
- Order and move: drag a brush within its group to reorder it (an accent bar marks where it will land), or onto another group to move it there. The brush's ⋯ menu offers Move earlier, Move later, Move to … and Remove from … for the same jobs without a drag.
- Manage groups: New brush group sits under the groups. The ⋯ beside a group's name renames it (or double-click the name), moves it up or down, or deletes it. Deleting a group never deletes a brush.
A group holds references, not copies. One brush can sit in several groups, and a saved brush you delete leaves every group it was in. Groups are stored in this browser.
Creating, saving & importing brushes
- Open the Library and pick the preset closest to what you want — it loads as the live brush.
- Tune it with the controls below. The preview shows a sample stroke; the Try scratch area lets you scribble to test the feel without touching your artwork.
- Reopen the Library, type a name, and click Save current — it captures every setting as a new brush under My brushes (built-ins can’t be overwritten). Custom brushes persist in your browser and can be deleted from the library.
- Capture a tip from what you drew (define a custom stamp from the active layer / selection), or Import a file — a PNG/JPEG image becomes a single brush tip, while a Photoshop .abr or Procreate .brush/.brushset imports the whole pack: every sampled tip lands under My brushes with its original name, and texture patterns / Procreate grains join your custom grain library (a Procreate brush keeps its own grain attached). Imported brushes keep their parameters, not just their tips: size, spacing, tip angle & roundness, pressure controls with their minimum floors, size/opacity jitter, scatter, rotation dynamics, wet edges, airbrush build-up and even dual-brush textures map onto the equivalent HappyPaint settings (the full source→target table lives in the project's brush-import spec).
- Share your brushes — every custom brush has a download button (and the library has an Export button for the current brush) that saves a .happybrush file: an open, documented format (a plain zip with the settings as JSON plus the tip/grain as PNGs — inspectable with any unzip tool). Import them back on any HappyPaint install with full fidelity.
Imported and captured brushes persist in your browser (tip bitmaps are stored in IndexedDB, so even multi-hundred-brush packs survive reloads). If storage is unavailable — some private browsing modes — the import still works for the current session and the notice will say so.
Presets are organised into categories — Sketching, Ink, Manga, Marker, Paint, Watercolor, Airbrush, Charcoal & Chalk, Texture & FX, Effects — each tuned for a different natural-media feel. The Manga category is the Clip Studio nib lineup: G-pen (the workhorse — whips from hairline to bold, and opens up under a light touch), Maru Pen (the finest nib, for hair and hatching; firm, so you must press for width), Kabura Pen (an even, dependable contour), School Pen (fine and firm, for backgrounds and effect lines) and Millipen (a technical fineliner: dead uniform, no taper, stabilised for ruling long straight edges). What separates them is pressure behaviour rather than size, so try them at the same size to feel the difference. None of the pens build up on themselves — crossing your own line stays solid black, the way ink does. Tone Scraper and Tone Fade are for working screentone back out again: a scrape is all-or-nothing, a fade is felt out over several passes.Screentone is an adjustment layer (Layers panel → Add adjustment layer), because a tone is a recipe rather than pixels: it re-screens at whatever resolution you output, so it never goes mushy when you resize or export. Set it by LPI — lines per inch, the way tone sheets are sold — with Density for how dark, Angle to stop two tones interfering, and a shape of Dot, Line, Cross or Sand (random rather than a grid, so it never moirés). Density from can take the level from the art underneath instead of a fixed number, which turns a grey painting into tone. Zoomed out, tone is shown as flat grey rather than a shimmering grid — that is a preview convenience only, and exports always contain real dots. Add a mask to the tone layer and erase on it to scrape highlights back out, using the Tone Scraper and Tone Fade brushes — a new tone arrives with its mask already active, so you can scrape straight away. Successive tones are given different angles automatically so they don't interfere.
The fastest way to tone a panel is the Tone checkbox on the Fill tool: click inside a closed shape in your line art and it drops a screentone layer masked to exactly that region, in one undo step. It uses Fill's own Tolerance, and expands slightly so the tone tucks under your anti-aliased lines instead of leaving a pale halo along them.
Set Density from to Gradient to fade a tone off across the page — Density is the near end, Gradient to is the far end, and Gradient angle points the ramp.Speech balloons live in the Text panel: pick a shape from the Balloon row — Speech, Rounded, Shout (the spiky one) or Thought (the cloud) — set its fill and outline colours, and point the Tail at whoever is speaking. The balloon travels with the text: retype it, restyle it or rotate it and the balloon reflows and turns with it, because it is part of the text object rather than a shape drawn behind it.
Focus Lines and Speed Lines live at the bottom of the same menu — the manga effect lines. Focus lines burst from the middle of the page for impact; speed lines sweep across it for motion. Both are drawn with your current brush, so a burst made with the G-pen tapers like one, and both arrive as editable path layers — move, scale or rotate them into place, or adjust individual lines with the Pen tool. Run them again for a new random arrangement.
Books. A manga chapter is more than one page, so the gallery has New book beside New drawing: pick a size the way you would for a drawing and you get a multi-page project with its first page ready. A page barappears under the tabs — arrows to turn, numbered pages to jump straight to one, and + to add a page at the end. Every page you add is made from the book's own spec, so a page added in chapter three matches page one in size, resolution, depth and paper. A book keeps one tab however far you flip, so opening a chapter never pushes your other drawings out of the strip. File → Save book writes the whole thing as a .happypaint-book, and Open file takes it back — that file is an ordinary zip, so you can unzip it anywhere and find one .happypaint per page, numbered in reading order. Drag a page number sideways to reorder the book — a tap still turns to that page — and the wider gaps in the strip show where each facing pair begins, so you can see how the book will be bound. The book icon beside the strip holds the two settings that decide that pairing: whether the book reads left-to-right or right-to-left (manga), and whether page 1 stands alone as a right-hand page — the book default, so pages two and three are the first pair that actually face each other. Both look right page-by-page and wrong at every scene break if you get them backwards, which is why the gaps move as you change them. Pages are ordinary drawings, which is what makes every other feature in this manual work on them; they show up in the gallery too. One thing to know: undo does not carry across a page turn — each page is its own canvas with its own history, exactly as tabs already work. Your artwork is never at risk, because the page you are leaving is saved before the turn.
Panels. The Panel tool in the tool dock draws them: drag anywhere on the page for a new frame, and drag across an existing frame to cut it in two — where the drag starts is what decides which of the two you get, so there is no modifier to remember. While you drag, a new frame previews as a rectangle and a cut previews as a line straight across the panel. The frame's corner handles show the whole time the tool is active: drag one to reshape that corner, or grab the frame line itself to slide the whole panel. Moving a frame doesn't move the art — the panel is a window onto layers that stay where they were, so sliding it is how you re-crop something you have already drawn, and a whole drag is one undo step. A new panel arrives as a group with an empty Art layer inside, ready to draw on, and a split hands the original its artwork and one half while a fresh empty panel takes the other. Anything you paint on a panel's layers is clipped to its frame — draw straight past the edge and the overspill simply doesn't show, so you can be loose inside a panel without cleaning up afterwards. The frame lines live on one editable path layer above the page (stroked with the Millipen, so they are Pen-editable like any other path) and are redrawn whenever the panels change. If you would rather not draw them, the Grid presets in the Panel tool's own options drop a ready-made layout, 1×2 up to 4×2 — they appear in the tool options whenever the Panel tool is picked.
The Effects category includes Glow, Fire, Sparkle, Embers, plus Clouds, Fog, Smoke, Nebula, Starfield and Lightning. Watercolor washes (Watercolor Wash, Dry Brush) dry with a darker edge — as each stroke settles, pigment gathers at the rim and granulates into the paper grain, like a real wash drying on paper. The Live watercolors (Watercolor Live, Wet-on-Wet Live, Water) go further: the paint stays wet after you lift the pen — washes keep spreading, bloom into other wet strokes, and settle into the layer as they dry over a few seconds. Paint behaves like it does on real paper: on dry paper a stroke stays where you put it and dries with a crisp, slightly darker edge, while on wet paper (a wet stroke, or a water wash) colour flows and blooms softly. Tip the canvas and a very wet stroke still runs downhill. Wet paper looks a shade darker while it’s damp and lightens as it dries, so you can see what is still workable. Like a real brush, a Live brush runs out on a long stroke: the wash narrows as the water goes, then turns into a dry brush that catches only the ridges of a textured paper (press harder to reach into the valleys). Lift and start a new stroke to reload. A Live brush paints with its own tip: give one a Bristle or Chalk tip, a flattened Roundness or an Angle in the brush editor and the wet marks take that shape, turning with the stroke when the brush’s rotation follows its direction. A 💧 Dry chip appears at the bottom of the canvas while paint is wet; tap it to settle everything at once. Next to it, the round tilt pad tips the canvas: drag the dot and wet paint runs downhill in that direction (drips and gravity washes); double-click the pad to level the canvas again. Wet paint has momentum: runs ramp up as gravity takes hold, coast a little further after you level the canvas, and deep puddles spread toward their shallow edges on their own — so fresh water pushed into a drying wash blooms back into it. The Water brush lays pure water (no pigment): it pushes still-wet paint around, and it re-wets dried paint — scrub a dried wash and the pigment lifts back into the water to bloom, run and edge-darken again (firm pressure dissolves faster, like scrubbing with a wet brush). The Blow brush is a directed air stream — it carries no paint or water and simply shoves whatever is currently wet along your stroke, like blowing through a straw on wet ink (it does nothing on a dry canvas). Every Live brush also has Water and Pigment sliders in the brush panel's Fluid section (how wet a stroke leaves the paper vs paint load; pigment 0 turns any Live brush into a water brush), plus Halo: how far the stroke's water reaches past its colour. At 1× a stroke on dry paper keeps a crisp edge; higher, it wets the paper around itself and the colour feathers out into it — Wet-on-Wet Live uses 1.5×. The document's paper (chosen in the New-drawing dialog) shapes all of it: rough tooth drinks water so washes dry unevenly, slows the spreading front into ragged fingers, and granulates — pigment lodges in the paper's valleys as it settles. Wet paint dries automatically before undo, layer switches, transforms and exports. In the Paint category, Oil Paint Live is paint that stays wet on the canvas: unlike watercolor it doesn't spread or dry on its own — come back a minute later with a knife, the Fan Blender or Blow and it still moves; dry it deliberately with 💧 Dry (undo, layer switches and exports dry it automatically). Impasto and Oil Paint lay thick paint: strokes build up real height and catch the light along their ridges, like oil straight from the tube — and the relief is baked into PNG and JPEG exports along with the paper's tooth, so the file looks the way the canvas does. Erasing takes the relief with the paint, so an area you clear goes properly flat before you paint it again.
Output & coverage
Size vs Opacity vs Flow are the three that trip people up. Size is how big. Opacity caps the whole stroke — overlapping passes within one stroke never get darker than this. Flow is how much paint each stamp drops: low flow builds up gradually as stamps overlap (soft shading), high flow goes solid at once.
| Size | Stamp diameter at full pressure (1–500 doc px) — the maximum width of the mark; pressure scales it down. [ and ] nudge it. |
| Brush size follows | What zooming does to your brush — a global setting (it applies to every brush), in the brush panel and Settings. Canvas: the size is a fixed width in the drawing, so zooming in makes the mark look thicker on screen — Krita/Photoshop behaviour, and the default. Screen: the size is in screen pixels, so the mark keeps the same on-screen thickness however far you zoom — Procreate behaviour, handy for detail work where you want the same visual line weight while zoomed right in. To see the difference, zoom to 400% and draw one line in each mode. The choice is baked in when a stroke starts, so zooming mid-stroke never changes its width. |
| Opacity | The stroke’s maximum strength (1–100%): a ceiling one pass won’t exceed — predictable, even coverage. |
| Flow | Paint laid per stamp (1–100%). Low + overlap = gradual build-up; high = opaque immediately. |
| Blend | How the stroke combines with the layer (Normal, Multiply, Screen, …). A Multiply brush deepens shadows; Screen/Add paints glow — without a separate layer. |
| Wash | Non-buildup mode: coverage tops out at the opacity instead of darkening with every overlap — a flat marker rather than layered ink. |
| Even build | Smooths build-up so overlapping stamps accumulate evenly regardless of spacing — removes darker “seams” where dabs overlap. |
Tip shape & smoothing
| Tip | The stamp’s shape: Round, Soft and Square are procedural (Hardness shapes their edge); the rest (Chalk, Spatter, Bristle, Leaf, Oil Daub, …) are image tips with their own texture. Picking a tip keeps the rest of the brush. |
| Angle | Turns the tip, 0–360°, counter-clockwise like Photoshop (45° lays a flat nib along “/”). It adds to whatever the brush already follows, so on a brush with Tilt above 0 a tilted pen swings the nib with its lean. Set Tilt to 0 for a nib that stays put. Also in the top strip, and Shift+[ / Shift+] turn it 15° at a time. |
| Roundness | Flattens the tip into an ellipse or flat nib, 5–100%. The long side stays at the brush Size and only the short side thins, so Round becomes a calligraphy nib and Square a chisel. Works with image tips too. With Angle it gives thick-and-thin strokes from a mouse. Spacing follows the nib’s width along the stroke, so hairlines stay solid. No effect while Wet is above 0. |
| Spacing | Gap between stamps as a fraction of size (2–200%). Tight = a smooth solid line; wide = a dotted/stamped trail. |
| Hardness | Edge falloff (0–100). 0 is a soft airbrushed edge that fades to nothing; 100 is crisp. |
| Smooth | Stabilizes shaky input (0–100%). Higher irons jitter into clean curves but adds a little lag. |
| Stabilizer | Optional pulled-string smoothing (per brush): the brush trails the cursor on a leash whose length scales with Amount — great for long, confident inking curves. Also in the top strip as a 0–100 slider, where 0 means off. |
| Dual brush | A second image tip carved into each dab (rotates/scales with the stamp) for textured, masked tips. Needs a dry brush — it has no effect while Wet is above 0. |
| Paper | How hard the document paper’s tooth bites this brush, 0–100%. Dry media (pencil, charcoal, pastel, Dry Ink) ship at 100% — that is what makes paper mean anything. Ink, gel pens and screentone ship at 0 and markers at 20%: they are wet or solvent media that flood the tooth, and a high-contrast ink line should not break up into pencil speckle. Turn it up on an ink brush if you want a dry-pen look. |
Pressure & tilt
How a pen’s pressure and tilt drive the brush. (No pressure hardware? Speed stands in, so fast strokes still taper.)
| Pressure | Overall pressure response — soft (eases in) to firm (reaches full quickly). The curve editor gives point-by-point control of pressure → size. |
| Size·P | How much pressure controls size: 0 = constant width, 100 = press-to-taper. |
| Flow·P | How much pressure controls flow/opacity. |
| Tilt | How far tilting a pen broadens/elongates the stamp, so you can shade with the side of the “pencil”. Drives chisel/calligraphy nibs (e.g. Chisel Marker, Chisel Inker) — pen only. |
| Speed→Size | Velocity sensitivity: faster strokes draw thinner (0 = constant, 100 = strong taper). Unlike pressure this works with a mouse, so it’s how you get a speed taper on hardware with no pen pressure. Multiplies on top of any pressure response. |
| Speed→Opacity | Faster strokes paint lighter — the opacity counterpart to Speed→Size, again mouse-friendly. |
| Squash | Faster strokes flatten each stamp into an ellipse; slow strokes stay round. For a flat nib at every speed, use Roundness under Tip. |
| Spin | Faster strokes rotate each stamp, up to a full turn. Only visible with a non-round tip (an image tip, or a flattened one). |
Jitter (randomness)
| Scatter | Throws each stamp off the stroke path — spray, stipple, foliage. |
| Size·J | Varies each stamp’s size for uneven, hand-made line weight. |
| Angle·J | Randomly rotates each stamp — breaks up the repeat in textured tips. |
| Space·J | Varies the gap between stamps so the cadence isn’t perfectly even. |
| Hue·J / Sat·J / Val·J | Independently jitter each dab’s hue, saturation, and value for lively, painterly colour. Seeded from the brush, so they show (and let you tune) the preset’s own colour dynamics. |
| Press→Dark | Pressure darkens the dab colour — a harder press lays down a deeper, richer colour (deterministic, not random). Great for pencils/pastels. |
| Hue→Shift | Sweeps the colour along a single stroke (± half the wheel, deterministic) — one stroke gradates hue, e.g. the Marigold brush’s yellow→orange→red petals. Negative shifts one way round the wheel, positive the other. |
| Tip col | Two-colour load: blends from your current colour (base) toward this colour along the stroke — a literal “yellow base → red tips” paint load. Toggle Off for single colour. |
Taper
| Taper In | Thins the first N px so the stroke starts from a point — the clean entry of an inking pen. |
| Taper Out | Thins the last N px so the stroke ends in a point. |
Wet mixing (Mixer Brush) & pigment
Turns the brush into wet paint that smears and blends with what’s already on the canvas, like an oil/acrylic mixer.
| Wet | Dilution: how much of the colour already on the canvas the brush drags along (0 = dry, no pickup). It does not set how opaque the mark is — Load and Opacity do that. Turning Wet up used to thin the mark as a side effect, which made a fully loaded brush paint a ghost. |
| Load | How much paint is on the brush. This is what drives the mark’s opacity and contrast, and it depletes along the stroke — run it out and you are left with a pure smear. |
| Mix | Canvas-pickup vs reservoir ratio (0 = your brush color, 100 = all picked-up canvas color). At 100 the brush carries no paint of its own, so Load has nothing to lay down. |
| Pigment | Subtractive (Kubelka–Munk) mixing on wet brushes: yellow over blue makes green like real paint, not RGB averaging. |
| Blender | Turns the brush you already have into a blender — the same brush, blending instead of painting. It keeps its own tip texture (so the brush marks survive the blend, unlike the Smudge tool, which wipes them smooth), takes its colour from the canvas, and softens the impasto it crosses instead of piling more on. While it is on, Wet is labelled Oil (how much paint it drags, and how much impasto it levels) and Load is labelled Pigment (how much of your own colour still goes down — 20% is a thin glaze); Mix follows from Pigment, so it steps aside. Press harder for a stronger blend. Ready-made: the Oil Blender preset in Paint. |
Oil & Pigment — mixing your own paint
On a body-paint brush (one that builds impasto — Thick Paint, RGBA Oil, Impasto, Oil Paint, Oil Blender) the same two sliders are labelled Oil and Pigment, and they behave like the real thing whether or not the Blender is on. They are properties of the paint, not settings of the mixer.
| Pigment | How much colour is suspended in the medium. It drives the opacity of the mark AND how much impasto it stands up: thin it down and you get a transparent glaze that leaves no ridge for the light to catch; at 100% you get full body colour standing off the canvas. A low-Pigment pass is a real glaze — it will not build past its own limit inside one stroke, but repeated passes stack, exactly like thin oil. |
| Oil | How much vehicle is in the paint. It is how much of the canvas colour the brush drags along, and — with the Blender on — how much of the impasto it knocks down as it passes. An oily blender is fluid and levels the ridges it crosses; a lean one drags the paint while leaving the texture standing. |
The document paper’s tooth follows the paint: it only bites a surface it can still reach. Thick paint fills the weave as you lay it, so a loaded daub goes down solid while the thin, dragged edge of the same stroke still breaks up on the tooth — which is why a low-Pigment glaze shows the paper through it and a full-Pigment one does not.
A wet brush keeps your pressure dynamics — a brush pen still tapers with pressure when you wet it. But it paints through the mixer rather than stamping a tip, so Grain, Dual brush and the document paper have nothing to act on and are greyed out while Wet is above 0. Set Wet to 0 to get them back. (The tip texture is the exception: turn Blend on and the mixer shapes its dab with the brush's own tip.)
Grain (texture)
| Pattern | The paper/canvas/grain/halftone texture multiplied into the mark (or none) — gives the brush its tooth. |
| Scale | Texture tile size in doc px: small = fine tooth, large = coarse grain. |
| Amount | How strongly the texture shows through (0 = smooth, 100 = full tooth). |
| Random per stroke | Off, the tile stays in the same place on the canvas every stroke — a paper tooth that builds up where you go over it. On, it is shifted and turned at random for each stroke, so overlapping strokes stop lining up the texture’s repeat. For a bigger, less repetitive texture raise Scale; to turn the tip itself at random, use Angle jitter. |
Under the hood, dynamics map sensors (pressure, speed, tilt, drawing angle, distance, fade, random) through editable curves onto size/flow/rotation/scatter — the foundation behind every slider above. The brush editor has a lot of controls, so there's a search box at the top — type “grain”, “tilt”, “velocity”… to filter the panel down to the matching sections.
Choosing a brush for the job
| Silhouettes / solid blocking-in | Ink — fully opaque (Opacity 100, Flow 100, hard edge) with Size·P at 100%, so the width is driven entirely by pressure while the fill stays solid black. Sumi-e Brush is the expressive alternative (bigger, tilt + taper), though its light touches read lighter as well as thinner. For instant shapes, turn on Fill mode (press F) and draw a closed loop to fill its silhouette with flat colour. |
| Knife-edge blending | Palette Knife — a hard square tip that rakes along the stroke direction and smears existing paint with almost no deposit of its own (the “blender knife”). |
| Soft smear / edge softening | Blender (soft round, pure smear) pushes colour around; Fan Blender (bristle fan) feathers and softens edges. Both pick up the canvas rather than laying new paint. |
| Thick oil / impasto daubs | Thick Paint and RGBA Oil use colour (RGBA) tips — each dab is a loaded flat-brush daub with paint value + hue-break, Krita’s RGBA thick-paint feel. Thick Paint tints the daub to your colour; RGBA Oil paints the tip’s own baked oil colours. The Tip colour toggle (shown for these brushes) switches between the two: On = the tip’s baked colours, Off = your picked colour. Tip hue / sat / bright recolour the baked paint, so you can take the same daub into any colour family. |
Color
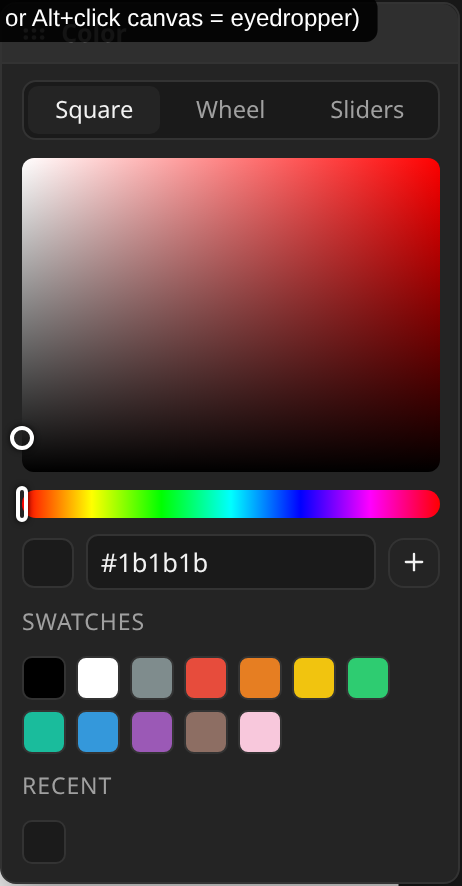
The current color is what the brush, fill, gradient and text paint with. Open the picker from the swatch in the tool options row; it floats and can be dragged out of the way (it then stays open while you paint). Several ways to choose, all editing the same color:
Foreground & background
The tool options row shows two swatches, Photoshop-style: the foreground in front — the colour you actually paint with — and a background parked behind it. The background never paints; it is a place to keep the second colour you keep coming back to, so flipping between (say) a skin tone and its shadow is one keystroke instead of a trip to the picker.
| Swap (X) | Exchange the two colours. Clicking the background swatch does the same thing — that is how it comes to the front where the picker can edit it. |
| Reset (D) | Back to the default pair: black foreground, white background. The mini black-and-white square next to the swatches is the same action. |
| Which one the picker edits | Always the foreground. Swap first if you want to change the background. |
| Where the background is used | Ctrl/⌘+Backspace fills with it, the Gradient tool’s "Foreground → Background" preset and any stop set to Bg ramp to it, and the canvas-resize "New area" picker can fill a grown canvas with it. Everywhere else, the foreground is the colour that paints. |
| Fill with a colour | Alt+Backspace fills with the foreground, Ctrl/⌘+Backspace with the background (Photoshop’s Edit ▸ Fill shortcuts). With a selection they fill inside it; without one they flood the whole layer. Full opacity, one undo step, and they respect Alpha lock — so a locked-alpha layer recolours its existing pixels instead of filling the empty space around them. |
| Square + hue | Hue on the strip, then drag inside the square for saturation (left→right) and brightness (top→bottom). |
| Wheel | Hue around the ring, saturation/value inside — handy for complementary/analogous hues. |
| Triangle | Hue ring + inscribed value/saturation triangle (classic painter’s picker). |
| H / S / V sliders | Type or drag exact Hue, Saturation, Value (and a hex value) for precise, repeatable colors. |
| Harmony | The hue ring with companion dots for the chosen relationship — complementary, split-complementary, analogous, triadic or tetradic. Tap a companion swatch to paint with it; + saves the whole scheme into the active palette. |
| Mix (intermediate colours) | A grid that blends between four corner colours, like Clip Studio Paint’s Intermediate Color palette. Tap a corner to set it to your current colour, then tap any cell to paint with it. Rows and Cols set the grid size (up to 15 × 15); one row makes a two-colour ramp between the top corners, the quickest way to find the steps from a shadow to a highlight. Perceptual mixing (the default) keeps the steps even in lightness and the blends clean; RGB mixes the way Clip Studio does, with darker, greyer midpoints. + saves the whole grid as a new palette. The corners and size are remembered. |
| Recent | Colors you’ve just used, kept so you can jump back without re-mixing. |
| Eyedropper | Sample a colour on the canvas: the Eyedropper tool (toolbar pipette / I) drags to sample with no modifier, or Alt+drag (mouse/pen) / touch-and-hold (finger) from any tool. A split-circle loupe shows old/new, and the picked colour joins Recents on release. |
Palettes
Swatches live in named palettes (Procreate-style): keep one palette per project or per artwork. The picker stays lightweight — a dropdown to switch palettes and the swatch grid — while the Palettes panel (the ⚙ Manage button, or dock it beside Layers) holds everything else. The + next to the hex field saves the current colour into the active palette; everything persists in the browser across sessions.
| In the picker | Switch palettes with the dropdown; tap a swatch to paint with it, drag to reorder, hover for ✕ to remove. |
| Palettes panel | One card per palette (tap to activate, preview strip, colour count) with rename, duplicate, export and delete; a roomy grid for the active palette below. Drag its title bar to float or dock it. |
| Import | Panel header → Import — opens Procreate .swatches, Photoshop .aco, Adobe .ase and GIMP .gpl files; each palette in the file arrives as its own named palette. |
| Export | On each card → writes that palette as a Procreate-compatible .swatches file (first 30 colours). |
| From image | Panel header → New from image — extracts up to 30 representative colours from a photo (median-cut) into a new palette named after the file. |
Working on several drawings
The strip above the canvas lists everything you have open. Click a tab to switch, ✕ to close, + to go back to the gallery. On a tablet the strip becomes a switcher button, because a row of tabs is the wrong shape next to a toolbar. If you would rather not have it,Settings → Documents → Open documents in tabs turns it off.
| Only one is loaded | The drawing you are looking at is the only one in memory — which is why keeping several open costs nothing. Switching reloads, and takes about half a second. |
| What comes back | Zoom, rotation and pan, the active tool, brush and colour, and the active layer are all saved per drawing, so a switch lands you where you left off. |
| What does not | The undo history of the drawing you leave. Finish an edit before switching if you might want to take it back. |
| Most tabs at once | Six by default (2–12 in Settings). Opening one past the cap closes whichever you looked at longest ago, saving it first. |
| Between drawings | Copy (Ctrl/⌘+C) in one, switch, paste (Ctrl/⌘+V) in another — it arrives as a new layer. A copy bigger than the drawing you paste into is cropped to fit. To take a whole layer or folder across with its settings, use the layer menu’s Copy layer / Copy group instead. |
| Saving on the way out | Switching saves the drawing you are leaving before the next one loads, wet paint included (it is dried first), so work from the last couple of seconds is kept. The spinner on the tab you picked stays until that save is written; the canvas ignores drawing meanwhile. |
| Switching | Ctrl+Alt+← / → cycle the open drawings; both are rebindable in Settings → Shortcuts. |
Layers
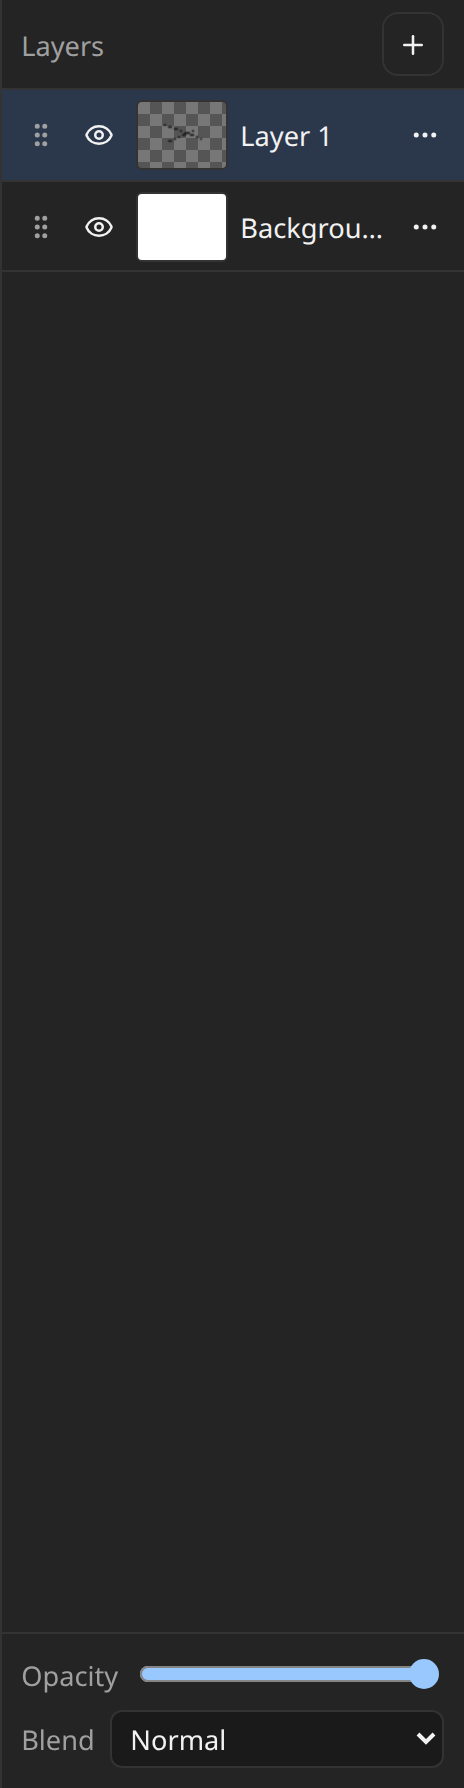
Layers stack bottom-to-top; each is composited onto the ones below via its opacity and blend mode. Keeping line art, color and shading on separate layers lets you change one without disturbing the others. Open a layer’s ⋯ menu (or right-click / long-press a row) for all its actions; swipe a row for quick actions.
| Opacity | How strongly the whole layer shows over those below (0–100%) — fade a layer back without altering its pixels. |
| Visibility / Lock | The eye hides a layer from the composite (and export); the lock blocks any pixel edits. |
| Alpha lock | Paint only recolours the layer’s existing pixels — its silhouette/transparency never changes (great for shading inside a shape). The brush’s blend mode still applies, so you can glaze with Multiply or Color Dodge strictly inside the silhouette; smudge and blender brushes stay inside it too. |
| Inherit alpha | Clip the layer to the composited alpha of everything below it in its container (a whole-stack clipping mask). |
| Groups | Bundle layers under one folder with its own opacity/blend, applied to the group as a whole. Select several rows (below) and hit Group, or use ⋯ ▸ Group on a single row. The chevron at the left of a group row collapses it — see below. |
| Groups inside groups | Groups nest, as deep as the work needs: ⋯ ▸ Group on a group row wraps it in a new group, and dragging one group onto another drops it inside. A character folder holding a Head folder holding Line art / Flats / Shading is the point — the whole branch moves, hides, and takes an opacity as one thing. The one move that is refused is dropping a group into itself or into something already inside it, which would take that branch out of the drawing. |
| Duplicate a group | ⋯ ▸ Duplicate group (or a left swipe on the row) copies the folder whole — every layer, mask, nested group, blend mode and colour label inside it — as one undo step. Only the folder itself is renamed “copy”; the layers inside keep their names, so a duplicated arm is still Line art / Flats / Shading. |
| Collapse a group | The ▸ / ⌄ chevron at the left of a group row folds its contents away, so a stack of eighty layers can be read as a handful of folders. A collapsed group stays collapsed when you reopen the drawing (it is saved with the document), and folding is not an undo step — Ctrl/⌘+Z steps back through your painting, never through your folders. Searching or filtering opens folded groups for as long as the filter is on, so a match is never hidden behind a twirl. |
| Colour labels | Right-click any row (or its ⋯ menu) and pick one of seven colours from the swatch strip at the top: the row gets a coloured bar down its leading edge. Groups take a label as well as layers, ⊘ clears it, and the strip stays open so a mis-pick is one more click rather than a re-open. With several rows multi-selected, the same swatches in the multi-select bar colour the whole set in one undo step — labelling every face in an expression sheet is one action. Labels are saved with the document and are purely organisational: they never touch a pixel or affect export. |
| Search & filter | The magnifier in the panel header opens a search box: type to narrow the list by layer name. The funnel beside it filters by kind (paint, text, vector path, adjustment, group, has-a-mask) and by attribute (locked, hidden, clipped, alpha-locked, masked, blend ≠ Normal, selected). Kinds and attributes are OR-ed within each list and AND-ed across them, so "text or adjustment, locked" is one filter. A group comes through whenever it matches or any layer inside it does. Reordering is off while a filter is on — a drop position means nothing when the row above isn't the layer above. |
| Select several layers | Ctrl/⌘-click a row to add or remove it, Shift-click to take everything between — or swipe a row right on touch. The bar above the list then acts on the whole set: Group, Merge, Duplicate, Lock, Hide, Colour, Delete. Dragging any selected row’s grip reorders them all together, and each action is a single undo step. The Move tool works on the whole set too: pick several layers, press V, and they move, scale, rotate, flip, distort or warp as one — each layer stays its own layer, nothing is flattened. Hidden and locked layers sit it out; selecting a group transforms what is inside it. |
| Actions | Add, duplicate, merge down, clear, delete, reorder (drag the grip), rename (double-click), and “Select pixels” (selection from the layer’s opaque pixels). Most of these also work on several layers at once. |
| Select pixels, combined | Ctrl/⌘-click a layer’s thumbnail selects it by its opacity — a solid pixel fully, a 30% brush edge 30% (a soft selection, as in Photoshop and Krita), so a copy or a fill keeps the soft edge instead of growing a hard halo. Hold Shift to add them to the selection, Alt to subtract them, Shift+Alt to keep only the overlap — Photoshop’s own modifiers, and the quickest way to refine a selection against artwork you have already painted. With a selection live, the same four sit in the layer’s right-click menu as Add / Subtract / Intersect, which is how you reach them on a tablet with no keyboard. |
| Merge visible | Combine all visible layers into a new “Merged” layer on top, leaving the originals intact (Photoshop “Stamp Visible”). The panel header’s ⋯ menu → Merge visible, or Ctrl/⌘+Shift+Alt+E. |
| Flatten image | Collapse the whole document into one layer, discarding the rest (hidden layers included). In any layer’s ⋯ menu. One undo step. |
Blend modes & what they do
A blend mode changes how the layer’s colors combine with the layers beneath — the heart of shading and lighting effects:
| Normal | Plain stacking — the layer covers what’s below (subject to opacity). Dissolve is Normal with its transparency turned into a random speckle. |
| Darken group | multiply, darken, color-burn, linear-burn, darker color — only darken. Multiply is the go-to for shadows, glazes and ink (white disappears). Darker Color picks whichever whole colour is darker. |
| Lighten group | screen, lighten, color-dodge, add, lighter color — only lighten. Screen/Add are for glows, highlights, fire (black disappears). |
| Contrast group | overlay, soft-light, hard-light, vivid light, linear light, pin light, hard mix — darken darks and lighten lights for contrast/pop. Hard Mix posterises to pure primaries. |
| Comparative | difference, exclusion, subtract, divide — invert/compare colors for high-contrast or alignment-checking effects. |
| Pass Through (groups) | The group’s layers blend with everything below as if they weren’t in a group, instead of being merged into one picture first — Photoshop’s default for groups, so PSD files keep their look. A group with a layer style, a panel frame or layers clipped to it still works as one picture. |
| Component | hue, saturation, color, luminosity — borrow one attribute. “Color” recolors art below while keeping its shading. |
Align & distribute
Line several layers up with each other, or with the page. Open it from View ▸ Align & distribute; it docks and tears off like any other panel.
It acts on the layers you have multi-selected in the Layers panel (swipe rows right on a touch screen, or Ctrl/⌘-click or Shift-click them), and on the current layer when none are — so tapping one layer and pressing Centre horizontally with Align to: Canvas centres it on the page. That is the same set the Move tool transforms, so “selected” means one thing throughout the app. Hidden and locked layers sit it out, and selecting a group means the layers inside it. Each layer is measured by its artwork, not by the canvas: the tight bounding box of its non-transparent pixels. Layers move by whole pixels only, so nothing is resampled, and however many move, it is one undo step.
| Align | Six buttons: left, centre, right — then top, middle, bottom. A horizontal alignment never moves anything vertically, and vice versa. |
| Distribute centres | Spaces the layers’ centres evenly, leaving the two outermost where they are. Needs three layers or more. |
| Even gaps | Equalises the space between neighbours instead. Identical to distribute when the layers are the same size, and the one you want when they are not — even centres leave a wide layer crowding its neighbours. Needs three layers or more. |
| Align to: Canvas | The page edges. |
| Align to: Selection | The live selection’s bounding box. With no selection made, it means the chosen layers themselves — so “centre these eight expression sketches on each other” is a single click, with no marquee to draw first. |
| Empty layers | Skipped. There is no artwork to align, and moving them would drag empty layers around behind your back. |
Text and vector-path layers align like any other, and stay editable — the move goes through the same transform path the Move tool uses, so text is re-rendered at its new position rather than baked.
Masks & clipping
Two non-destructive ways to control where a layer shows, without erasing its pixels:
| Layer mask | A grayscale companion to the layer (⋯ → Add mask). White reveals, black hides. With the mask active, painting/erasing edits the mask (black to hide, white to reveal) — the layer’s own pixels stay intact. |
| Edit mask / Edit layer | Toggle whether your strokes target the mask or the colour. A masked layer shows two thumbnails, the layer’s content then its mask. Click either one to paint into it; the one you’re painting into has an accent frame. Ctrl/⌘-click the mask thumbnail to load it as a selection — soft, so grey areas come out partly selected — with the same Shift / Alt / Shift+Alt modifiers as the layer thumbnail. A disabled mask shows a red cross. |
| Density & Feather | In the Properties panel (View ▸ Properties) with a masked layer selected: Density weakens the mask (at 50% the hidden part shows at half strength), Feather softens its edges by a blur — neither changes the mask itself, so both can be undone or retuned any time. Photoshop files keep both. |
| Vector mask | Paths that hide everything outside them, kept as paths — crisp at any zoom and after any move, scale or rotate. Make one with the Pen: draw a path, then Create Vector Mask (right-click, or Path ▾); it masks the paint layer directly below. Properties ▸ Vector mask: Apply (keep the paths but stop hiding with them), Invert (show outside instead), Delete. A pixel mask and a vector mask can share a layer, and both apply. Photoshop files open with theirs live and save them back; one Photoshop marked “unlinked” stays put when the layer moves. To change the shape, edit the path and make the mask again. |
| Knockout | Properties ▸ Knockout punches the layer’s shape through the layers under it, as in Photoshop’s Blending Options: Shallow reveals what is under the layer’s group, Deep reveals the Background (the bottom layer when it is locked, as a Photoshop file’s is — otherwise transparency). At full Fill the layer covers its own hole, so lower the Fill in Layer Styles to see through it — cut-out text and windows are the classic uses. Photoshop files keep the setting both ways. |
| Blend If | Properties ▸ Blend If shows a layer only where tones allow, as in Photoshop’s Blending Options. This Layer: drag its black slider right to drop the layer’s darks, the white slider left to drop its lights. Underlying Layer: the same for what is under the layer — e.g. let a texture show only over the lights below. Alt-drag a slider (or tick Split) to pull its halves apart for a soft fade instead of a hard cut. Gray uses brightness; Red, Green and Blue each test one channel. Reset lets every tone through again. |
| Mask ops | Invert, Disable (keep but stop applying), Delete, Mask from selection (pack the current selection into the mask), and Selection from mask. |
| Clipping mask | Confines a layer to the opaque pixels of the one directly below — paint shading or colour “inside” existing artwork without spilling past its edges. Releases just as easily. |
| Clipping mask over a group | The layer below can be a GROUP, not just a single layer: put the layer directly above a group, turn on its Clipping mask, and it is confined to everything that group draws combined. That is how you glaze or shade a whole character built from a folder of parts without first merging it. (Photoshop cannot do this; Krita and Clip Studio can.) Hiding the group hides what is clipped to it. |
Use a clipping mask to add shading on top of a base shape; use a layer mask to hide/reveal parts of a finished layer (e.g. fade an edge) you might want back later.
Adjustment layers
A non-destructive filter that lives in the layer stack and re-colours everything below it at composite time — so you can tune the look forever without baking pixels (Photoshop adjustment layers / Krita filter layers).
| Add | Layers panel ⋯ → Add adjustment layer… opens the kinds under the same categories as the Adjust menu (Color, Blur, Distort, Pixelate, Stylize…) — open a category, then pick one to drop an adjustment layer above the active layer. |
| Edit | Select the adjustment layer; its settings appear in the Properties panel (it opens when you add one; otherwise Edit settings… in the Layers panel footer, or double-click the layer’s thumbnail). Drag to re-tune live (one undo step per drag). |
| Scope | By default it affects the whole stack below. Turn on its Clipping mask to scope the effect to just the layer beneath (and whatever else is clipped to it below the adjustment) — right out to its soft edges, and a blur or generator stays inside that layer. |
| Mask it | Add a mask to the adjustment layer and paint it to limit where the effect applies (e.g. brighten only a face). |
| Opacity | Acts as effect strength — dial the adjustment back without changing its parameters. |
| Bake | “Merge down (bake)” applies the adjustment into the layer below and removes the adjustment layer. |
Kinds available as adjustment layers: Brightness/Contrast, Hue/ Saturation, Black & White, Color Balance, Exposure, Vibrance, Photo Filter, Channel Mixer, Selective Color, Color Lookup, Levels, Curves, Gradient Map, Posterize, Threshold, Invert, Replace Color, Selective Color+, Gaussian/Motion/Radial Blur, Tilt-Shift, Iris Blur, Field Blur, Spin Blur, Light Rays, Sharpen, Noise, Twirl, Pinch/Bulge, Ripple, Polar Coordinates, Mosaic, Crystallize, Halftone, Screentone, Emboss, Oil Paint, Wind, Chromatic Aberration, Bloom, Glitch. The generators (Lens Flare, Clouds…) and Line Art make a new layer instead, so they are in the Adjust menu only. You can’t paint on an adjustment layer (only on its mask).
Fill layers
A layer that is a picture rather than a filter, and stays editable: Photoshop’s New Fill Layer. Three kinds, all from Layers panel ⋯ → New fill layer: Solid Color (one colour), Gradient (a gradient you can re-drag, re-colour or reshape long after you made it) and Pattern (a tile repeated across the canvas).
| Solid Color | Starts in your foreground colour; Properties opens on it with a colour swatch and Use foreground colour. Double-click its thumbnail to get back there. |
| Pattern | Properties shows eight built-in patterns — Checker, Stripes, Dots, Grid, Brick, Crosshatch, Halftone, Canvas weave — drawn in two colours you choose (they start as your foreground and background). Import image… uses your own picture as the tile instead: it is scaled down to fit 512 px and kept inside the document, so the file carries it. Scale (10–1000%) and Angle turn and size the tiles; the round handle on the canvas is where the tiling starts — drag it to slide the pattern. An imported pattern takes a moment to appear after a document opens; merging, flattening or exporting waits until it has. |
| Make a gradient one | Gradient tool with the tool options row’s output set to Fill layer: drag on the canvas, and the drag becomes a Gradient fill layer above the active layer. Or Layers panel ⋯ → New fill layer: Gradient, which spans the canvas. Either way it starts from the Gradient tool’s current shape, stops and Reverse, and the colours are copied in: a fill layer keeps its colours, it does not follow the swatches later. |
| Selection | With a selection active, the new fill layer gets it as a mask (and the selection is used up), as in Photoshop. |
| Move its ends | Select the fill layer: its start and end show as handles on the canvas. Drag either one. With the Gradient tool active, a drag on empty canvas redraws the whole ramp. Each drag is one undo step. |
| Edit its colours | With the fill layer selected, the Colour panel’s Gradient section edits it: shape, stops, midpoints, opacity per stop, Reverse, presets. Double-click its thumbnail (or Edit gradient… in the Layers panel) to open the Colour panel on it. Fg / Bg on a stop copy the swatch colour once. |
| Opacity, blend, mask, clipping | All behave as for a paint layer: clipped, it only covers the pixels of the layer beneath, and its transparent stops show that layer through. |
| Bake | “Merge down (bake)” paints it into the layer below. |
| PSD | Solid Color and Gradient fills go to Photoshop as live fill layers (with their pixels too, for apps that don’t draw fills) and come back live; a Pattern fill is written as pixels. |
You can’t paint on a fill layer (only on its mask). Solid Color and Pattern are edited in the Properties panel; Gradient in the Colour panel.
Properties panel
The selected adjustment layer’s settings, in a panel of their own (Photoshop’s Properties panel). They used to sit at the bottom of the Layers panel, where a curve or a column of sliders pushed the layer list into a corner.
| Open it | View menu → Properties; Edit settings… in the Layers panel footer; double-click an adjustment layer’s thumbnail. It also opens by itself when you add an adjustment layer. |
| Where it lives | Docked on the right, under Layers. Like every panel, drag its title to float it, dock it to either side, or drop it on another docked panel’s header to share a tab strip; fold it to its title with its chevron. |
| What it shows | The settings of whichever adjustment layer is selected — select another and it follows. For a paint, text or path layer it says there is nothing to edit. A Gradient fill layer’s colours and shape are edited in the Colour panel (its Edit gradient… button takes you there). |
| Editing | Changes show live; each slider drag, keyboard change or curve edit is one undo step. |
Smart filters
A filter you can change your mind about. Instead of baking a blur, noise or distortion into a layer’s pixels, keep it as a smart filter: it stays listed under the layer, where you can hide it, re-open its settings, reorder it or delete it at any time. The layer’s own pixels are never touched — hide every filter and the layer is exactly as you painted it. Photoshop does this with Smart Objects; here any paint, text or path layer can carry them.
| Add one | Pick a filter from the Adjust menu as usual, set it up with the live preview, then press Smart Filter instead of Apply. Several can stack on one layer. |
| Edit | Click the filter’s name under the layer: its settings open again with a live preview. Apply keeps the change (one undo step), Cancel puts it back. |
| Hide / show | The eye beside each filter. Undoable. |
| Order | The list reads like Photoshop’s: the top filter runs last. The arrows move a filter up (later) or down (earlier) — a blur before noise is not the same as noise before a blur. |
| Delete | The ✕ beside the filter. The layer’s pixels come back unfiltered. |
| Painting on it | Allowed. While you draw, the stroke shows as painted; when it lands the filters run over it too, so a blurred layer stays blurred wherever you paint. |
| Bake | Layer ⋯ ▸ Bake smart filters makes the filtered look the layer’s real pixels and removes the list (on a text or path layer this also turns it into pixels). Merge down bakes automatically; a PSD export writes the filtered pixels. |
| What can be one | Every colour adjustment, blur, sharpen/noise, distort, pixelate and stylize filter. Not the Render generators (clouds, fog, lens flare…) or Line Art — they create new content on a layer of their own. |
| Saving | The list saves with the drawing and in .happypaint files; older versions of the app open such a file without the filters. |
Layer styles (Blending Options)
Photoshop’s layer effects: an outline, shadows, glows and colour overlays drawn from a layer’s own shape. They are settings, not pixels, so they follow the art: paint, erase, move or transform the layer and its stroke and shadow move with it, and you can change or remove them at any time. Any paint, text or path layer can have them.
| Open | Layer ⋯ ▸ Blending options…, or click the fx badge on a styled layer. The list on the left switches effects on and off; click a name to see its settings. Every change shows on the canvas as you make it. OK keeps them (one undo step), Cancel or Esc puts the layer back. |
| Bevel & Emboss | Turns the edge into a lit slope: a highlight on the side facing the light, a shadow on the other. Style: Inner Bevel (the slope inside the shape), Outer Bevel (a ramp around it), Emboss (half each) or Pillow Emboss (pressed into the canvas). Depth is how steep it reads, Up / Down raises or sinks it, Size is how wide the slope is, Soften rounds it. Angle and Altitude place the light; Highlight and Shadow set each side’s colour and strength. |
| Contour | Under Bevel & Emboss in the list: the slope’s profile, picked from little curves (Linear, Half Round, Gaussian, Cone, Cone – Inverted, Ring, Rolling Slope). Ring gives a double ridge, Cone a sharp crest. Off, the slope is smoothly rounded. |
| Texture | Under Bevel & Emboss: presses a pattern (brick, weave, dots…) into the surface so it catches the same light. Scale and Depth size it; Invert pushes it out instead of in. |
| Stroke | An outline of any width and colour, Outside, Inside or Center on the edge. |
| Drop Shadow | The layer’s shape offset away from the light and softened. Angle is where the light comes from (120° = upper left, shadow down-right), Distance how far, Size how soft, Spread how much of the size stays solid. |
| Inner Shadow | The same, cast inside the shape from its edge. Choke is its Spread. |
| Outer / Inner Glow | A soft band of colour around the outside, or along the inside of the edge. Size is how far it reaches; Spread / Choke keeps more of it solid. |
| Satin | A silky sheen inside the shape: its softened outline shifted both ways along Angle by Distance, and lit where the two copies disagree. Size softens it, the Contour curves shape the bands, Invert swaps light and dark (on by default, as in Photoshop). |
| Color Overlay | Paints the whole shape one colour, keeping its soft edges and transparency. |
| Gradient Overlay | Paints the shape with a gradient: edit the stops on the bar, pick the style (Linear, Radial, Angle, Reflected, Diamond), angle and scale, or Reverse it. It spans the whole canvas. |
| Pattern Overlay | Fills the shape with one of the fill patterns (dots, brick, weave…) in two colours of your choice, at any scale. The pattern is fixed to the canvas, so it stays put when the layer moves. |
| Styles (presets) | The Styles page at the top of the list holds whole looks: click one to apply it (it replaces the layer’s style, as in Photoshop). Built in: Sticker, Ink Outline, Soft Shadow, Neon, Embossed and Gold. Type a name and press New Style to save the current style; your styles are kept for every drawing, and × deletes one. Import Photoshop styles (.asl)… brings a Photoshop style library in: each of its styles is added to yours, by name (patterns and pattern textures stay behind, as in PSD files). |
| More than one | Stroke, Drop Shadow, Inner Shadow, Color Overlay and Gradient Overlay have a + beside them: add up to four of each, e.g. a thin white stroke inside a thick dark one for a sticker outline, or two shadows at different distances. The first in the list is drawn on top; − removes an extra one. |
| Global Light | Shadows and Bevel & Emboss have Use Global Light (on for new ones, as in Photoshop): every effect that uses it shares one light, so turning the Angle (or a bevel’s Altitude) of one turns them all, on every layer, when you press OK, in one undo. Untick it to give an effect its own angle. New shadows start at the document’s light. |
| Blend | Every effect has its own blend mode, against the layers below (and, for the inside effects, the layer itself): a Multiply shadow darkens a coloured background instead of laying grey over it, a Screen glow brightens. Hue, Saturation, Color and Luminosity are there too, so a Color Overlay in Color mode recolours art and keeps its shading. New effects start with Photoshop’s choices: shadows and Satin Multiply, glows and the bevel’s highlight Screen, everything else Normal. Styles made before v0.196.3 keep Normal, so they look as they did. |
| Fill opacity | Under Blending Options. Fades the layer’s own pixels but not its effects: at 0% only the stroke, glow and shadow show, which turns line art into an outline. |
| Opacity and blend mode | The layer’s own Opacity and blend mode (Layers panel) apply to the layer and its effects together, so a Multiply layer multiplies its shadow too. A layer clipped to a styled layer is clipped to its styled shape, outline included. |
| Groups | A group can have a style too (⋯ on the group ▸ Blending options…). It is applied to the group as one picture, so a Stroke outlines everything in the group together, with no lines where its layers overlap, and a Drop Shadow falls under the whole group. Layers clipped to the group clip to its styled shape. A group’s style can’t be baked (it has no pixels of its own); flattening keeps the look, and a PSD export writes it as the group’s live Photoshop effects. |
| Inherit alpha | A layer with Inherit alpha is styled first and then clipped to the layers below, as a styled layer inside a Photoshop clipping mask: its outline shows only where the layers below are. |
| Painting on it | Allowed. Overlays colour new paint right away; the outline, glows and shadows catch up the moment the stroke lands. |
| Copy / paste | Layer ⋯ ▸ Copy layer style, then Paste layer style on other layers: the quick way to give a whole expression sheet the same outline. |
| Bake / clear | Layer ⋯ ▸ Bake layer style makes the effects the layer’s real pixels; Clear layer style removes them. Merge down bakes automatically, and PNG/JPEG exports show them as you see them. |
| Photoshop files | Styles travel as live Photoshop layer effects, both ways: a PSD export writes each layer’s and group’s effects (and its Fill opacity) for Photoshop to draw and edit, and opening a PSD brings its effects in editable. Effects set to Use Global Light take the file’s light angle. Several copies of an effect cross too (up to four), and Use Global Light keeps its link to the file’s light. Not carried: Pattern Overlay and the bevel’s Texture (Photoshop’s patterns are its own), copies beyond four, noise gradients, and Chisel bevels (read as Smooth). An app that can’t draw layer effects will show the layers without them. |
| Relief from before | The Bevel slider that used to sit under the Layers panel is now Bevel & Emboss here. Drawings that used it keep their relief; Layer ⋯ ▸ Remove relief clears it (it also clears painted impasto relief). |
| Not yet | Imported images as Pattern Overlay patterns. Baking draws every effect Normal (there is nothing below a layer’s own pixels to blend with), so a coloured Multiply shadow bakes as its plain colour; black and white effects bake unchanged. Effects draw with their own soft falloff (Photoshop’s “Precise” technique) rather than a blur. |
| Saving | Styles save with the drawing and in .happypaint files; older versions of the app open such a file without them. |
Selections & transform
A selection masks the canvas so painting, fills, adjustments and transforms only affect the chosen area. Marching-ants show the boundary; deselect to paint freely again.
Selections can be soft: a pixel can be partly selected, the way it is in Photoshop and Krita. Selecting a layer by its opacity or loading a layer mask gives one, and so does Feather. Everything then happens in proportion — a stroke, fill, clear, copy or adjustment over a 40%-selected pixel does 40% of its work. The marching ants trace the half-way line, so a very faint selection (nothing above 50%) can be live with no ants showing. The shape tools and the magic wand make hard selections, exactly as before.
| Make | Rect (M) / ellipse / lasso (L) / polygon / magic wand (W, tap a colour). Hold Shift while dragging a rect/ellipse to constrain to a square/circle; with the polygon lasso, Shift constrains a segment to 45°. |
| Selection modes | Four buttons in the options row — New, Add, Subtract, Intersect — shared by every selection tool. The mode sticks until you change it, so building a selection out of several pieces needs no keyboard at all (the reason it exists: a pen-only tablet has no modifier keys). Shift = add, Alt = subtract, Shift+Alt = intersect still work and override the button for that one gesture. Subtracting everything away simply clears the selection. |
| Magic wand | Selects a colour region — Contiguous (connected) or global (all matching), with a Tolerance slider. The layers icon is Sample all layers: off, it looks at the active layer only; on, it selects by the picture as you see it (all visible layers together), as in Photoshop. |
| Save / load selection | The bookmark-plus button in the selection strip saves the current selection under a name (Photoshop’s Select › Save Selection). The bookmark button lists the saved ones: click a name to load it using the current mode — New replaces the selection, Add / Subtract / Intersect combine with it. The bin deletes one. They are kept with the document (saved, reopened, exported as .happypaint), and follow Canvas Size, crop, Trim and Image Size. A soft selection saves with its softness. Loading, saving and deleting are each one undo step. |
| Refine | Expand / Contract / Smooth the selection by a set Amount in pixels — type it in the toolbar field (1–200) and click, so trimming 20px off a lasso is one click rather than ten. Expand and Contract keep a soft edge soft; Smooth tidies the outline and gives a hard edge. Feather gives the edge a soft falloff — it stays live, so you can change it after selecting. |
| Commands | Select all (Ctrl+A), invert (Ctrl+Shift+I), deselect (Ctrl+D). |
| Selection ↔ mask | Turn a selection into a layer mask, or load a mask back as a selection (layer ⋯ menu, or Ctrl/⌘-click the mask thumbnail — +Shift add, +Alt subtract, +Shift+Alt intersect). Both ways keep every shade of grey, so selection → mask → selection comes back exactly. |
| Transform (Move tool) | Move/scale/rotate the layer or just the selected pixels. Enter commits, Esc cancels. |
| Transform handles | Corner handles scale uniformly; the bars on each side stretch that one axis. The pinned point is always the handle opposite the one you drag, so the far edge stays where it is. The stem above the box rotates. |
| Shift / Alt while scaling | Shift on a side handle keeps the aspect ratio, so a middle handle scales the layer proportionally instead of stretching it (corners already do). Alt scales from the centre — the box grows or shrinks on all sides at once — and Shift+Alt combines the two. Either modifier can be pressed or let go mid-drag and the box updates on the spot. |
| Shift while moving | Dragging the layer with Shift held snaps the move to horizontal, vertical or 45°, measured from where the drag started. |
| Without a keyboard | Two sticky buttons in the Move options row do the same job on a tablet: Uniform (side handles keep the aspect ratio) and From centre. They stay on until you turn them off, and Shift / Alt then INVERT them for a single gesture — with Uniform on, Shift is how you get a free stretch back. Resting a second finger on the canvas while a pen drags also counts as Shift, the same way it does for the marquee and shape tools. |
| Distort | Free 4-corner / perspective transform — drag each corner independently. |
| Warp | Mesh warp — drag a control lattice to bend the pixels smoothly. |
Adjustments & filters
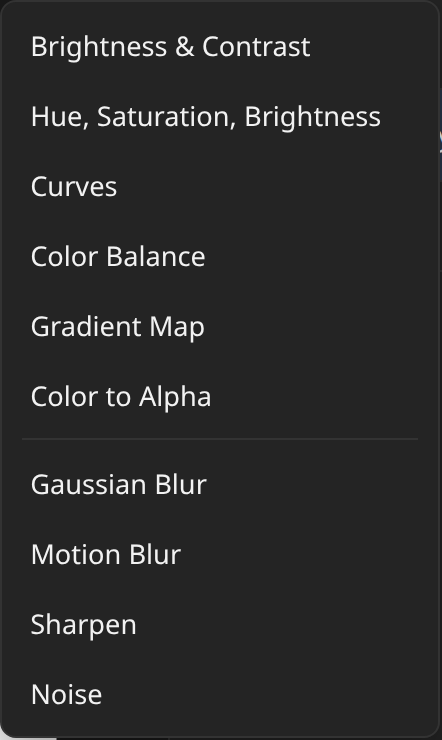
Adjustments re-process the active layer’s existing pixels (they don’t paint new color). Each opens a live preview — drag sliders, then Apply or Cancel. With a selection, only those pixels change. Want it non-destructive and re-editable forever? Use an adjustment layer instead, or press Smart Filter to keep it live on the layer (smart filters).
Two ways in: Adjust in the menu bar, or the Layers panel’s ⋯ → Adjustments — the same menu, put where you are already working. Its twin in that ⋯ menu, Add adjustment layer, is the non-destructive version: the first bakes into this layer, the second adds an adjustment layer above it.
The menu opens on Photoshop’s category names — Color, Blur, Sharpen & Noise, Distort, Pixelate, Stylize and Render (the menu bar's Adjust adds Effect lines) — so a filter is where you would look for it in Photoshop. Each category opens its effects in a side menu: hover with a mouse, tap with a finger or pen. The number beside a category is how many effects it holds. On a phone the list covers the menu, with a Back row at the top. The last few effects you picked sit under Recent at the top, one click away. Keyboard: ↑/↓ move, → opens a category, ← or Esc goes back. Enter applies the open filter, Esc cancels it.
| Brightness & Contrast | Brightness shifts lighter/darker; contrast pushes lights and darks apart or together (±100 each). |
| Hue / Saturation / Brightness | Rotate all hues (±180°), make colours more vivid or muted, lighter or darker. For recolouring and mood. |
| Curves | Reshape the tonal response by bending a curve — lift shadows, drop highlights, add an S-curve for contrast. |
| Levels | Set input black/white points + gamma and the output range — quick contrast and tonal mapping. |
| Color Balance | Push Shadows, Midtones and Highlights separately along Cyan–Red, Magenta–Green and Yellow–Blue — warm the highlights and cool the shadows for a classic grade, or correct a cast in one range only. Preserve luminosity (on by default) moves only the colour, not the brightness. |
| Exposure | Photoshop’s Exposure, worked in linear light like a camera: Exposure in stops (+1 doubles the light), Offset lifts or sinks the shadows, Gamma bends the midtones. |
| Vibrance | Saturation that boosts muted colours more than ones already vivid (so skin and skies don’t go garish); Saturation beside it is the plain, even kind. |
| Photo Filter | Look through a coloured lens filter (warming orange by default): pick the Colour and the Density; Preserve luminosity keeps the brightness, so only the colour shifts. |
| Channel Mixer | Build each of Red, Green and Blue from all three (percent, −200…200) plus a constant. Monochrome builds one grey from your mix — the classic way to make a black-and-white with the look of a coloured filter. |
| Gradient Map | Map tones by brightness onto a multi-stop gradient — drag the bar to add colour stops, drag them to reorder, double-click to delete, click to recolour. Two stops = a duotone; more = rich stylized grades. |
| Black & White | Photoshop’s: choose how light each colour turns — Reds, Yellows, Greens, Cyans, Blues, Magentas (40 / 60 / 40 / 60 / 20 / 80% is Photoshop’s Default) — so a red dress and a green field that would be the same grey come out different. Tint colours the result (sepia by default); Amount fades it. |
| Invert / Threshold / Posterize | Invert colours; 1-bit luminance stencil; reduce to N tone steps. |
| Replace Color / Color to Alpha | Recolour pixels near a target colour (preserving shading); or knock a colour out to transparency. |
| Color Lookup | Recolour through a 3D colour table (a LUT): a film look, or a grade made in your photo or video editor. Load LUT… takes a .cube or .3dl file (up to 129³); the panel shows which one is applied. Photoshop’s Color Lookup layers open live with their table, and save back to PSD as Color Lookup layers. Photoshop’s profile-based lookups (Abstract and Device Link) and its .look files are not read yet — those layers come in as before, and still save back unchanged. |
| Selective Color | Photoshop’s: pick a colour range — Reds, Yellows, Greens, Cyans, Blues, Magentas, Whites, Neutrals or Blacks — and add or take away Cyan, Magenta, Yellow and Black in it, as a printer thinks of colour. Taking Magenta out of Reds turns them toward yellow; adding Black to Neutrals deepens the midtones only. Relative changes each ink by a share of what is there; Absolute adds the full amount. A dot marks the ranges you have changed. Selective Color+ (below) is our own, sampled-colour version. |
| Selective Color+ | Grade by sampled colour range: eyedropper a colour off the canvas, set how far the selection Reaches and how soft its edge is, then shift that range’s Hue / Sat / Val. Stack up to 8 samples — skin, sky and foliage each graded separately in one adjustment, and overlapping ranges blend instead of fighting. Tick Show range to see exactly which pixels are selected (red) and which aren’t (dimmed). |
| Blur | Gaussian (uniform), Motion (angle + distance) and Radial. Radial has two modes: Zoom streaks everything toward a centre (pull the eye to a focal point, or make a light beam burst), Spin rotates around it. Click or drag on the canvas to place the centre. |
| Blur Gallery | Depth of field, as in Photoshop. Tilt-Shift keeps a band sharp and blurs away from it: drag the solid lines to set the sharp zone, the dashed lines to set where the blur is complete, and the end handle to turn the band. Iris Blur keeps an ellipse sharp: the outer handles size and turn it, the inner one sets the sharp core. Field Blur blends between pins: click the canvas to add one (up to 8), drag to move it, Alt-click to remove it, and set each pin’s blur in the panel. Pin 0 on the foreground and 20 on the distance is the classic environment set-up. Spin Blur spins what is inside an ellipse — fit it to a wheel or fan, even one drawn in perspective, and the spin follows its rim. Light bokeh (Tilt-Shift, Iris, Field) turns bright spots in the blurred areas into lens discs; Bokeh range sets how bright a spot has to be. |
| Sharpen & Noise | Sharpen edges; add noise (Monochromatic or colour) to fight banding or give a print-grain finish. The noise is random per pixel with no repeating pattern, at any canvas size. |
| On-canvas handles | Filters with a place on the picture (Radial Blur, Twirl, Pinch / Bulge, Polar Coordinates, the Blur Gallery, Light Rays, Lens Flare) draw handles over the canvas while their panel is open. A click away from the handles moves the centre there (Field Blur: adds a pin). The same handles appear when you select an adjustment layer of these kinds, and each drag is one undo step. |
| Distort | Twirl (swirl around a centre, strongest in the middle, fading to nothing at the Radius), Pinch / Bulge (positive pulls the image in toward the centre, negative swells it out like Spherize), Ripple (water-like waves: Height, Wavelength and the Angle they travel), Polar Coordinates (rectangular to polar wraps the picture into a disc, with its top edge at the centre; polar to rectangular unwraps it). Liquify sits here too: it is a brush, so picking it switches to the Liquify tool. |
| Pixelate | Mosaic (square tiles, each the average of its area), Crystallize (irregular facets, each one colour), Halftone (dot screen). |
| Stylize | Emboss (lights the picture as if it were carved: Light angle, Height, Amount; grey relief by default, or tick Keep colour to add the relief to your colours for a texture pass), Oil Paint (smooths flat areas into strokes while keeping edges; Brush size and Sharpness), Wind (bright edges blow into streaks: Direction, Length, Amount), Bloom (glow bright areas), Chromatic Aberration, Glitch (RGB split / row-tear), and Line Art (edges onto a new layer). |
| Line Art | One-click photo → line art (Sobel edges or inky XDoG) onto a new layer above the source — a base to ink over. |
Text
The Text tool (T) creates text layers— a dedicated, non-raster layer kind. Text stays editable and resolution-independent until you rasterize it. Set font, size, colour, alignment, bold/italic, outline, background, line height and letter spacing in the floating Text panel. Commit with ⌘/Ctrl+Enter or by clicking away; Esc cancels.
| Add text | Click empty canvas to type. If a text layer is active the new text is added to it (multiple text objects per layer); otherwise a new text layer is created. |
| Edit | Tap an existing text with the Text tool to edit wording/style. Clearing all its text deletes that object. |
| Style characters | Select any characters while editing and use the bar above the text: bold, italic, underline, strikethrough, smaller/larger, apply the current colour, or a different font — per selection, like Photoshop (Procreate can only style whole objects). Styling stays editable and survives save/reload. |
| Move / box | Drag a text object with the Text tool; a per-object box gives corner-scale (font size), a rotate knob, and move — all staying editable vector. |
| Wrap width | Drag the box’s right-edge handle to set a wrap column — words reflow to that width. Drag it wide to fit the text again. Stays editable vector. |
| Scale / rotate | The Move tool (V) also scales/rotates a text layer crisply (it re-renders at the new size). |
| Convert to paint layer | Layer menu → bakes the text to pixels so you can paint on it. Painting is otherwise disabled on a text layer. |
| Auto-rasterize | Liquify/Warp, an adjustment, a non-uniform stretch, or merging a text layer down rasterizes it automatically, then proceeds. |
Fonts: built-in system/web-safe families, plus your own. The bottom of the Text panel has two ways to add a custom font — both add it to the Font dropdown, select it, and persist it in the browser (each shows in the removable list below, with a trash icon). Text stays editable across save/reload.
Load a Google Font (by URL — no download needed). On fonts.google.com pick a font and copy its embed link (e.g. https://fonts.googleapis.com/css2?family=Pacifico&display=swap). In the panel, type the exact family name in Font name (e.g. Pacifico — it must match the family= in the URL, or the text falls back to a default), paste the link into Font / Google Fonts URL, and click Add. Adding the font needs an internet connection, but once loaded it is cached by the app and keeps rendering offline.
Upload a font file (from your computer — works offline). Use the Upload font file button to pick a local .ttf/.otf/.woff/.woff2 file — for a font you bought or downloaded, or that isn’t on Google Fonts. The file is stored with the app, so it keeps working with no connection. (You can also paste a direct link to a font file in the URL field; there the name is just a friendly label — the file is downloaded and stored the same way.)
Shapes: the Shape tool & QuickShape
Two ways to get a clean shape, and they produce the same thing. The Shape tool (U) is the deliberate one: pick the shape, then drag it out. QuickShape is the gesture: draw it freehand and hold still, and the stroke snaps.
The Shape tool (U)
Pick Line, Ellipse, Rectangle or Polygon in the toolbar and drag on the canvas. The shape previews live from the first pixel and is stroked with your current brush, colour and size, so a textured nib stays textured — this is a real brush stroke, not a flat vector line.
| Line | Drags end to end. Shift snaps to the nearest 45°, keeping the length you dragged. Alt grows the line both ways from the press point, so the press is the midpoint. |
| Ellipse / Rectangle | Drags out a bounding box, corner to corner. Shift gives a perfect circle or square; Alt draws from the centre instead of a corner. |
| Polygon | A regular polygon of 3–12 sides — set the count in the toolbar. It draws from the centre out: the drag length is the radius and the drag angle spins it, so you can place a rotated hexagon in one gesture. Shift snaps that angle to 15° steps. |
| Fill | The bucket toggle fills the shape with the current colour, at the brush’s opacity, underneath the outline. A line encloses nothing, so it ignores the setting. Fill and outline undo together, in one step. |
| Rotating | Rectangles drag out square-on: turn one with the rotate knob before you commit. Polygons can be spun by the drag angle as you draw and re-angled from the knob afterwards. |
| On a tablet | Hold a second finger down while dragging instead of Shift — same constrain, no keyboard. |
QuickShape (draw & hold)
Draw a freehand stroke with the brush or eraser and hold still at the end (~0.6s): the stroke snaps to a clean line, ellipse, rectangle or polygon (it detects corners). Hold Shift once it has snapped to lock to 45°, a perfect circle, or a square.
It has to recognise what you drew, so it has limits the Shape tool doesn’t: anything but a line must be closed (end near where you started) and a line must be near-straight, or nothing happens at all. The polygon it gives you traces the corners you actually drew — for an exact hexagon, use the Shape tool. QuickShape also stays out of the way of wet and fluid brushes, and of hard perspective snapping, where the hold means something else.
Editing, either way
| Line weight | Set by the brush: the Size and Opacity sliders in the top strip apply to shapes exactly as they do to a stroke, and [ / ] resize while the tool is active. The brush library button beside them picks which brush the shape is drawn with. |
| Move it | Drag the shape itself — anywhere inside it, or on the line for a line — and it slides, handles and all. The cursor turns into the move arrows when you are over it. A tap without a drag commits instead, so tapping anywhere still finishes the shape. |
| Handles | The shape stays editable after you lift: drag a bbox corner to resize, the round knob to rotate, or a polygon vertex to move just that one corner. Polygons rotate from the knob as well — it sits just past the first vertex and points the way the shape faces. Hold Shift while rotating to snap to 15°. |
| Commit | Enter, or tap anywhere off the shape. Switching tools commits it too. |
| Drawing the next one | You do not have to commit first — starting a drag anywhere off the current shape commits it and draws the new one in the same gesture. Starting the drag ON the shape moves it instead, so leave a gap if you want a fresh one. |
| Cancel | Esc throws it away. |
| With guides | Combine with Perspective/Symmetry for on-grid straight edges and mirrored shapes; grid snapping pulls the drag to grid nodes. |
Rulers, guides & symmetry
Non-destructive overlays drawn above the canvas to help you align and construct — never part of the artwork or export. Open the Guides popover from the top row (it’s a movable, maximizable window). Everything here is saved with the drawing, so your setup is still there when you come back to it.
Rulers and guides
Shift + R puts tick bars along the top and left edges of the workspace. Drag from a bar onto the canvas to pull out a guide — from the top bar a horizontal one, from the left bar a vertical one. The bars stay on screen however far you zoom in and read the drawing's coordinates under them (past its edges too, where they go negative), so you can place a guide at an exact measurement without zooming out to find the corner. The stretch of each bar over the drawing is shaded a little lighter. Once you rotate the canvas, the bars move onto the drawing's own top and left edges and turn with it, so the numbers still measure the paper rather than the screen. Straighten it again and they return to the workspace edges.
| Units | px, cm or inches, cycled in the Guides panel. cm and inches come from the drawing’s DPI, so set that in Document properties first if you are working to a print size. |
| Edit guides | Shift+G (or “Edit guides” in the panel) turns on the mode where guides are draggable. Painting is suspended while it is on, so a stroke is never eaten by a guide lying across your artwork. Escape leaves the mode. |
| Move a guide | In Edit guides, drag it. |
| Any angle | In Edit guides, drag on empty canvas to draw a guide along the drag — press where you want it anchored and pull in the direction you want it to run. Alt+drag an existing guide to swing it about its anchor. Hold Shift either way to lock to 15° steps, and the status bar shows the angle live as you set it. |
| Delete a guide | Drag it back onto a ruler, or off the drawing, while moving guides — the universal gesture. “Clear” in the panel removes them all at once. |
| Undo | Guides are on the same undo stack as your painting, so Ctrl/⌘+Z takes back an accidental nudge or a Clear. A whole drag counts as one step, not one per pixel moved. |
| Lock | “Lock all” makes guides un-draggable while they keep snapping — useful once a layout is settled and you are painting over it. Locked guides draw dashed, in the same colour. |
| Guide colour | Pick one in the Guides panel. The default blue disappears over blue-heavy artwork, which is exactly when you need to see the guide — set it to something that contrasts with what you are painting. Saved per drawing, like the guides themselves. |
| Snap to guides | On by default. A stroke started near a guide begins on it and runs along it, and the Pen tool drops anchors on it. Turn it off in the panel to keep the guides purely visual. |
| Add without a ruler | “Add H” / “Add V” in the panel drop a guide down the middle of the drawing — the way in when you are zoomed too far in to see the edges. |
| Measure | Shift+D, then drag: the status bar reads the distance (in your chosen units) and the angle, and the line stays on screen until you take another or press Escape. Painting is suspended while measure is on. |
Grid, symmetry and perspective
| Grid | A reference grid (cell size 4–512 px + subdivisions) that pans/zooms/rotates with the canvas. Optional snap-to-grid. Assignable colour. |
| Symmetry | Mirrors your strokes live — vertical/horizontal/both (quadrant) for faces & symmetrical design, or radial (2–24 spokes) for mandalas. Y toggles; Shift+Y (or the crosshair) drags the axis to reposition the mirror. Works for brush, eraser, smudge and wet paint. |
| Perspective | 1–5 vanishing points. Snapping is Off / Soft (nudges a freehand stroke toward the nearest VP, keeping wobble) / Hard (a clean re-aimable line committed on release). Drag the VPs in “Edit points”. |
| Fish-eye | 5-point spherical/curvilinear perspective — curved arc families + radial spokes; strokes can snap to the arcs (Soft/Hard). Density and colours are adjustable. |
| Show guides | Hide the overlay while keeping snapping active — sketch in perspective with no lines visible. |
Images, camera & reference
| Insert image | Add a photo/PNG as a new layer — File ▸ Insert image…, the image button in the tool options row, drag-and-drop onto the canvas, or paste a clipboard image (Ctrl/⌘+V). It’s scaled to fit and centred. |
| New doc from photo | From the gallery, start a fresh document sized to an image. |
| Camera | Capture a photo from your device camera straight onto a layer (editor) or as a new document (gallery) — live preview, front/rear toggle. Needs camera permission on a secure (https) page. |
| Copy / cut / paste | Ctrl/⌘+C / X / V on the selection (or the whole layer) via an internal clipboard; paste a system image with Ctrl/⌘+V. The same four are buttons on the selection strip. |
| Selection to its own layer | Ctrl/⌘+J copies the selected pixels onto a new layer right above (Layer via Copy); Shift+Ctrl/⌘+J cuts them there (Layer via Cut). One undo step, and the clipboard is left alone. Also the first two buttons on the selection strip, and Duplicate in the three-finger-swipe menu. |
| Copy a layer or group | Layer ⋯ ▸ Copy layer (Copy group on a folder) takes the whole thing — name, blend mode, opacity, mask, clipping, and for a folder every layer inside. ⋯ ▸ Paste layer above, or Ctrl/⌘+V, puts it back here or in another open drawing. Paste uses whichever you copied last: pixels or a layer. |
| Reference window | A floating companion panel: import a reference image, pan/zoom it, and eyedrop colours from it into your palette. Draggable/resizable; remembered per document. |
Procedural FX (Render)
The menu bar's Adjust menu ends with aRender section. Light Rays casts god rays from a light you place (click or drag on the canvas): only bright areas cast them, so a lit window throws shafts and dark shapes cut shadows into them. Lens Flare draws a camera flare — core, star, halo ring, optional anamorphic streak and ghost reflections along the line through the frame centre — onto a new layer set to Screen, so it only ever brightens. The rest synthesize content onto a new layer: Clouds, Fog,Smoke, Nebula andStarfield and Lightning, each with a live-preview panel.
| New layer | Every generator makes its own layer above the active one, so it never alters what is below. |
| Region | With a selection active, the effect fills only the selection; otherwise the whole canvas. |
| Controls | Scale (feature size), Detail (octaves), Density, Softness, Swirl (domain warp), and two colours the noise blends between. |
| Re-roll | The 🎲 button picks a new random seed for a fresh pattern; the seed is saved, so the look is reproducible. |
| Presets | Clouds/Fog/Smoke/Nebula share one fractal-noise field (different scale/detail/warp/colours); Starfield scatters sparse bright points. |
| Lightning | A branching bolt (top→bottom, Start/End X positions), with Jaggedness, Branches, Glow, Width and colour — a glowing electric arc onto a new layer. |
Recording & time-lapse
Record your session and replay or export it as a time-lapse — great for process videos and undo-proof history.
| Record | View ▸ Record drawing logs every operation as you paint; a red ● REC chip in the menu bar shows it is on (click it to stop). Recording captures commands, not just frames, so replay is exact. |
| Replay | Open Replays to play back, scrub the timeline, change speed, and restart. |
| Branch | Seek to any point and Branch to save that state as a new document — explore a different direction without losing the original. |
| Export | Save the time-lapse as MP4 (or WebM) or an animated GIF. A portable .happypaint-rec file stores the whole recording. |
Animation (flipbook)
Turn a document into a frame-by-frame animation. Open it from theView ▸ Animation (or Shift + A). Each top-level layer becomes a frame (a layer group is a frame with sub-layers), bottom of the stack first. A timeline strip appears at the bottom; painting always lands on the current frame.
| Flipping | The keys an animator wears out: , and . flip back and forward a frame, < and > jump to the first and last, K plays and pauses, N adds a frame after the current one, O toggles onion skins, Shift + M drops a marker, Alt + , and Alt + . flip marker to marker, Shift + I and Shift + O set the play range, and Shift + A turns animation mode on and off. All of them are rebindable under Settings → Animation. |
| Draw on what you see | The playhead owns the selection: step to a frame and you are painting on it, and the same holds while playback runs, so you can animate rain, sparks or speed lines by dabbing as the frames go by — the trick Callipeg is known for. A stroke never splits across two frames; whatever frame you started it on gets the whole thing. Selecting a frame’s layer in the Layers panel works the other way round and moves the playhead to it. |
| The ruler | Above the thumbnails is a ruler with one cell per frame of time: a frame held for six frames is six cells wide, so uneven timing is visible at a glance. Drag anywhere on it to scrub. The thumbnails stay a fixed width on purpose — they are there to identify a drawing, the ruler is there to show timing. Tap the frame count to read the timeline in seconds instead of frames. |
| Tracks (exposure sheet) | A flipbook is one row of drawings. Convert to tracks… (in a frame’s ⋮ menu) turns those frames into a track, and the timeline becomes a grid: rows are tracks, columns are frames of time. A cell spans however long its drawing is held, and a blank space is a gap — which is the point, because it lets a colour track hold still under a line track that changes every frame. Tap a cell to pick that drawing and that moment; tap a row name to switch to that track without leaving the column you are on. Background and foreground layers stay outside the tracks and show on every frame. Converting changes nothing about your timing: the drawings keep their holds and their order. Onion skins follow the track you are drawing on. |
| Building up tracks | + Track at the bottom of the grid adds an empty row above the one you are on and moves you onto it, ready to draw — that is how you get a line track over a colour track over a background, each timed separately. Drag a cell along its row to retime that drawing: slide it later to open a gap, pull it back to close one. Dragging is retiming, never reordering, so a drawing cannot overlap or swap places with its neighbours — reordering drawings is still the Layers panel’s job. A short press without movement is still just a tap, so selecting works as before. Tracks, their timing and any gaps are saved with the document. |
| Filling in a row | A blank cell is a gap: the row draws nothing there. Tap one to go to that column on that row, and double-tap it to add an empty drawing right there — or use + Drawing to add one at the playhead. Either way it lands only where the row is actually empty; a column that already shows a drawing is not a gap, and happypaint will say so rather than shove the neighbours along. That is the discipline of an exposure sheet: timing changes because you moved something, never as a side effect. |
| Managing the rows | Hover a row name and three controls appear. ▲ and ▼ move that track in front of or behind the others — rows are the compositing order, so this is how the line track gets on top of the colour — and the timing is untouched by it. The bin deletes the track and every drawing on it; the last remaining track is always kept, since a tracks document with no tracks is just a flipbook again. Tap a row name to switch to that track without leaving the column you are on. |
| Retiming cells | The batch ops work on grid cells too: Shift or Ctrl/Cmd-tap a cell to start a selection, then Duration ×N, Split into ×N, In-between, Duplicate and Delete act on the cells you picked. A selection belongs to one row — the timing ops read the track you are on — so modifier-tapping a cell on another row moves you to that row and starts a fresh selection there. |
| Markers | The ⚑ button drops a marker on the playhead (Shift + M), and the panel there lists them all — rename one, tap its swatch to cycle its colour, tap the frame number to jump to it, or delete it. Markers show as coloured tabs on the ruler and belong to the ruler, not to the drawings: retiming or reordering frames leaves them where they are, because they mark a moment in the shot. Alt + , and Alt + . flip from marker to marker, which is how you check a run of key poses. |
| Play range (mark in/out) | Shift + I sets the in point and Shift + O the out point (both are in the ⚑ panel too). Playback then loops inside that range only, and the ruler hatches the slots outside it. Press play from outside the range and it starts at the in point rather than playing nothing. "Full range" clears it. Markers and the range are saved with the document. |
| Out of pegs | Animators slide the paper under their hand to keep a head turn on model — draw against a neighbour that sits where you need it rather than where it was drawn. Turn on Out of pegs at the bottom of the onion panel, pick which ghost to move, then drag the canvas: that ghost slides, and your drawing does not move at all. Rotate and Scale turn or resize it. It is purely a display offset — no pixels, no layers and no history are touched — so Reset this / Reset all put everything back exactly. The offsets are saved with the document. Nothing in Procreate does this. |
| Retiming several frames | The ☑ button turns on frame selection: tap thumbnails to add them (or Shift-tap for a range and Ctrl/Cmd-tap for individual frames without leaving the playhead). Then act on the lot — Duration ×N holds them all, Split into ×N cuts a long exposure into sheets of that length while keeping the total timing, In-between drops an empty frame after each one to draw into, plus Duplicate, Delete and All / Invert. With nothing selected, the ops fall back to the current frame. |
| Frames | Tap a thumbnail to select a frame; drag to reorder. + adds an empty frame right after the current one and moves onto it. The transport plays/pauses and steps frame-by-frame. |
| Onion skins | The ⧉ button ghosts neighbouring frames — previous in red, next in green — so you can draw against them. Up to eight each way, with opacity falling off the further a frame is from the one you are on. The on/off switch (also O) keeps your counts for when you turn them back on. |
| Onion bar | Under the before/after counts is a pip per neighbour (−3 … +3). Tap one to mute just that frame and tap again to bring it back — useful when one drawing in the run is muddying the view. The rest keep their distance fade, so muting −1 does not promote −2 to full strength. |
| Onion colours & placement | Set your own before/after colours (Reset returns to red/green), or untick Tint to see the neighbours in their original colours — handy for checking shadows and light across frames. Draw in front puts the ghosts over the current frame instead of under it, which is what you want when your drawing is dark enough to swallow them. Hide while scrubbing takes the ghosts out of the way while you drag the ruler. |
| Hold & roles | A frame’s ⋮ menu: duplicate, hold it for extra time (×N), delete, or mark it Background/Foreground so it shows under/over every frame (a static scene). |
| Playback | FPS and loop mode (Loop / Ping-pong / Once). Playback and onion skins are preview-only — your layers are never changed. |
| Export the marked range | With a play range set, the export menu offers “Marked range only” — the stretch you marked to review is the stretch you hand over, instead of the whole shot. |
| Export | The ⬇ button exports as an animated GIF, MP4/WebM video, a PNG sequence (.zip), or a Standalone HTML player — a single self-contained file that plays offline in any browser (no HappyPaint needed). Pick a background: transparent (kept for GIF/PNG; video falls back to white since video has no alpha), white, or a custom colour. All offline. |
Documents, save & export
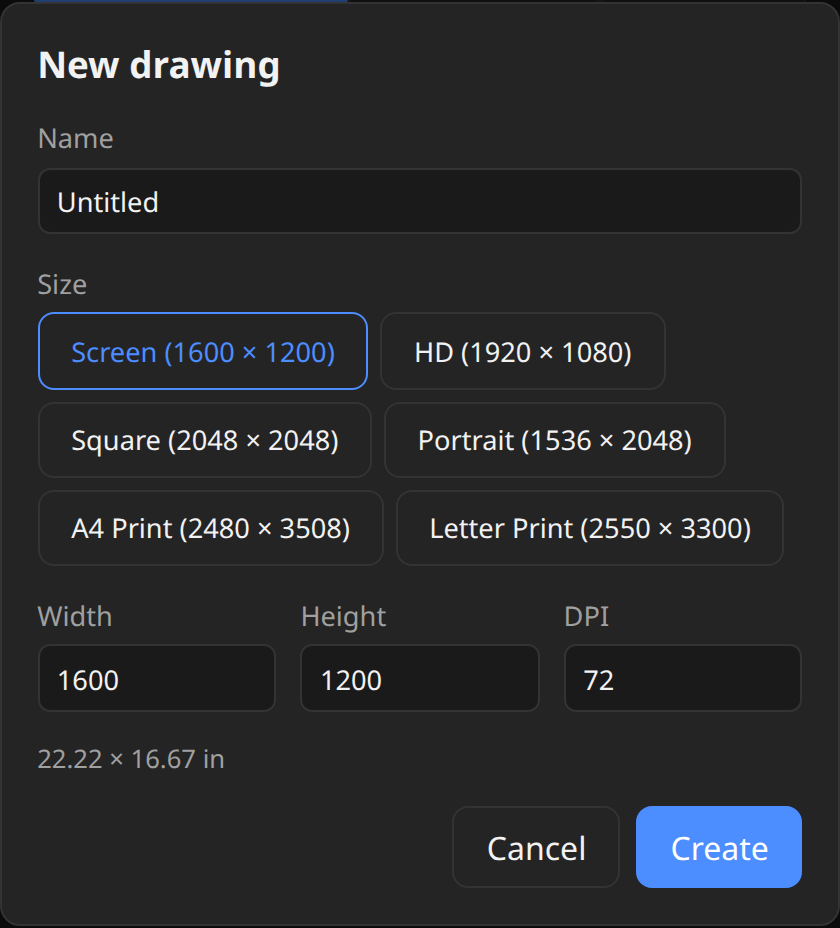
Pixel size sets the canvas resolution; DPI only sets how big it prints (300 = print, 72 = screen) — it doesn’t change the pixels. The dialog previews the physical size live.
| New | Name, size, DPI, bit depth, colour mode (stated: RGB · sRGB), and paper (a swatch grid: Smooth, Cold Press, Hot Press, Rough, Khadi, Washi, Laid, Canvas, Toned Sand, Kraft, Student, Linen). Picking a paper also sets the Background to the paper’s colour, until you pick a colour of your own. The name is focused when the dialog opens, and Enter creates the drawing from any field (Esc closes). |
| Size presets | Grouped by what you are making. Print has A4, A5, A3, Letter, Legal, Tabloid, 5 × 7 and 8 × 10, each at a real print resolution; Screen has Screen, HD, 4K UHD, Square, Social square and Phone at 72 DPI. Every card shows its pixel dimensions and DPI, because that is what you actually choose on. The bigger sheets are offered at 200 DPI to keep memory down. For any other size, type it in cm, mm, inches or px: a canvas can be as large as your graphics card allows, up to 16384 px per side. If the size you type goes past that, the dialog says so; it never shrinks the canvas without telling you. |
| Saved sizes | Set any width, height and DPI and press “+ Save” to keep it under the Saved tab — a name field opens straight away (optional; Enter keeps it, leave it empty and the card just reads W × H). “✎” on a card renames it, “✕” removes it. They persist across sessions. Handy if you always work to one client format. |
| Size readout | Pixels, centimetres and inches are shown together and update live, so you never have to switch the Unit control just to check the other measurement. The Orientation buttons (portrait, landscape) flip the width and height to match — A4 portrait to landscape without retyping; the lit one shows the current orientation, and a square canvas lights neither. |
| Paper | The surface you paint on: twelve choices, each shown as a swatch with a wash across one corner — Smooth, ten real papers (Cold Press, the all-round watercolour sheet; Hot Press, smooth and crisp; Rough, deep and knobbly; Khadi, lumpy handmade rag; Washi, cloudy Japanese kozo with long fibres; Laid, with laid and chain lines; Canvas, a fine plain weave; Toned Sand, a honeycomb tooth on a tan sheet; Kraft, smooth brown recycled; Student, an even machine texture) and Linen. The handmade and recycled sheets carry their own character too — Khadi’s cotton fibres and dark inclusions, Washi’s long silky fibres, Kraft’s streaks and flecks, a cloudy tone on most sheets — drawn into the paper like its relief. The papers are sized in millimetres, so a sheet looks the same at any resolution: at 300 DPI the tooth is large and crisp, at 72 DPI it is a fine grain. Each paper has a sheet colour; New drawing sets the Background to it, and Document properties has Apply paper colour to Background (one undo step). Drawings made before these papers keep their classic Rough, Fine grain or Canvas, which stays in the picker while the drawing uses it. The paper does three things. It is visible: pick Canvas or Linen and the weave is on the canvas straight away, lit as a real surface rather than printed as flat noise, anchored to the drawing so it scales as you zoom. It bites dry media: a pencil or charcoal on Rough breaks up over the ridges the way it does on real cold-press, and each further pass works more graphite into the tooth instead of leaving permanent white specks. And it drives the wet simulation — a rough tooth drinks water so washes dry unevenly, breaks a spreading front into ragged fingers, and granulates pigment into the valleys. Change it any time from Document properties; dried paint keeps the paper it was painted on. Smooth (the default) leaves the canvas perfectly flat. The eraser is never carved by the paper — erasing clears in one pass on any surface. Two controls shape how it reads: Texture scale in Document properties sizes the tooth (drop it for a fine sketching-paper grain, raise it for coarse blotchy cold-press) — it only appears once the paper is something other than Smooth, since a flat surface has no tooth to size — and each brush has its own Paper amount in the brush panel — ink and markers ignore the tooth so they stay high-contrast, pencil and charcoal take it in full. |
| Bit depth | 8-bit (standard), 16-bit float (smoother gradients — recommended), or 32-bit float (HDR/pro). Float docs composite in scene-linear light for correct edges and glow. |
| Colour mode | Documents are always RGB — painting, layers and blending all composite in RGB (like Procreate, and Krita’s default). There is no CMYK working mode; the print path is instead View → Print preview (CMYK proof) to see the ink shift on screen, and Export → TIFF (CMYK) to separate for the press, optionally through your own .icc profile. The New-drawing dialog and Document properties both state the mode so it never has to be inferred. |
| Colour space | Documents are sRGB. (Wide-gamut Display-P3 support is built into the display pipeline but the selector is hidden until the wide-gamut painting/import side lands — it’d look identical to sRGB until then.) |
| Document properties | Open it from File ▸ Canvas size, or by clicking the size/DPI in the status bar. It shows colour mode/depth/colour space, changes the paper (the canvas surface updates immediately and wet media re-simulates on the new texture; dried paint keeps the paper it was painted on), sizes its tooth with Texture scale (the slider unlocks as soon as the paper is not Smooth), and holds the two document-size operations: Resize the canvas (crop/extend with a 3×3 anchor) and Scale the image (resample all layers). |
| New area (canvas extension colour) | When the canvas GROWS, the exposed space is transparent by default. The "New area" picker — in the Canvas size dialog and in the options row while you drag the edges — fills it with the background or foreground colour, white or black instead, matching Photoshop’s Canvas extension color. It only paints the BOTTOM layer, the one standing in for Photoshop’s Background; every layer above it stays transparent out there, which is what you want when the layers above are line art. |
| Canvas size | Three ways to change the artboard without starting a new document, all one undo step and none of them resample the artwork. Type it: width, height and a 3×3 anchor deciding where the existing content sits in the new canvas. Drag it: “Drag the edges on canvas” puts handles on the canvas bounds — pull any edge or corner in to crop or out to add space, watch the live pixel readout, then Enter (or ✓) applies and Esc (or ✕) cancels. Or let the artwork decide: “Trim to artwork” (Photoshop’s Image ▸ Trim) opens the same drag session already set to the visible artwork’s bounds, so you see the crop before it happens — nudge any edge if you like, then ✓ (Enter) applies and ✕ (Esc) cancels. Trim looks at every visible layer, ignores layer masks (they only hide pixels — cropping what a mask could later reveal would be lossy), and says so rather than doing nothing when the artwork already fills the canvas. Cropping never throws art away: what falls outside a smaller canvas stays with its layer, out of sight, and a bigger canvas reveals it again. |
| Autosave | Every change saves to the browser (IndexedDB), debounced and flushed when you hide the tab. Offline-capable (PWA) — installable, works without a connection. |
| .happypaint | The portable document file: all layers, masks, groups, editable text, depth/DPI in one file. Reopen it from the gallery — the only format that preserves everything. |
| Save / Save As (Ctrl + S / Ctrl + Shift + S) | File ▸ Save As… asks where to put the .happypaint file — any folder, any name — and File ▸ Save writes back to that same file without asking again (the first Save of a drawing asks, like Save As). Each open drawing remembers its own file until you reload the app. Works in the desktop app and in Chrome / Edge; Firefox and Safari cannot write to a file you picked, so there both download the file instead, to wherever your browser puts downloads. |
| PSD / PSB | Open any Photoshop .psd or .psb from the gallery (Open file) — RGB, CMYK, Lab, Grayscale, Indexed and Duotone, at 8, 16 or 32 bits — and export back to .psd from the Export dialog. Layers, groups (including Pass Through), every blend mode, opacity, clipping, masks, locks, colour labels, resolution and guides come in and go out. Nothing in the file is lost: each layer keeps its original Photoshop data, so a layer you have not painted on goes back exactly as it came — its 16-bit or CMYK values, and text, smart objects and shapes included — and a file you open and export without changing anything comes back identical, byte for byte. A CMYK, Lab or 16-bit file is shown and painted in RGB; a layer you paint on is converted back to the file’s own mode and depth (CMYK through the file’s colour profile). Text, smart objects and shapes show as Photoshop rendered them and can’t be edited here yet — painting on one turns that layer into pixels. Adjustment layers stay live for Invert, Posterize, Threshold, Brightness/Contrast, Levels, Curves, Hue/Saturation and Gradient Map, as do Solid Color and Gradient fill layers; layer styles go both ways as live layer effects (see Layer styles). A document that never was a PSD exports as 8-bit RGB. |
| Netpbm (.ppm) | Open .ppm / .pgm / .pbm / .pnm images from the gallery (ASCII P1–P3 and binary P4–P6, 8- or 16-bit) — the image lands on its own layer above a white Background. You can also drop one on the canvas or use Insert image to add it as a layer in the current drawing, and Export → PPM writes an uncompressed portable pixmap (binary P6 or plain-text P3, flattened onto white — no transparency). Handy for graphics/CV tooling browsers can’t display natively. |
| Export image | Flatten to PNG (keeps transparency) or JPEG (smaller), at 25–200% scale, with the document DPI and an ICC colour profile embedded — other apps and print drivers know the exact size and colour space instead of assuming. Exports carry the surface you painted on: the paper’s tooth and any impasto relief are baked into the file, so a Rough or Linen drawing looks in the export the way it looks on canvas. |
| Print (CMYK TIFF) | Export → TIFF (CMYK) writes the file print shops ask for: flattened onto white and separated into C/M/Y/K inks at the document DPI, within a 300% total ink limit and with black kept out of the light tones. It separates through the same press as Print preview, so what you proofed is what you hand over. |
| Press profiles (.icc) | Load your printer’s CMYK profile (FOGRA, SWOP, GRACoL…) from either View → Print preview → Press, or the TIFF export dialog — it is the same app-wide press either way, and it is remembered between sessions. Print preview and the gamut warning then show exactly that press’s colours, the TIFF separates through the profile, and the profile itself is embedded so prepress reads the intent. Without one, the built-in generic coated press applies. |
| Google Drive | Optionally connect Google Drive to save/open .happypaint files in the cloud (client-side, drive.file scope — only files you create). |
Settings & customization
| Settings (Ctrl + ,) | Edit ▸ Settings… opens Settings, as does Ctrl/Cmd + , from anywhere in the editor (the same chord closes it, and it is rebindable under Settings ▸ View). The first section is configurable keyboard shortcuts, grouped as Tools, Brush, View and Animation — click an action to rebind it; duplicate combos are flagged; reset per-action or all. |
| Brush cursor | Choose what follows the pointer while a paint tool is active: Ring (an outline at the brush’s size, following the tip shape), Crosshair (a small fixed cross at the exact centre), Ring + crosshair, or Dot. The crosshair earns its keep with a big soft brush, where a wide ring tells you the size but not precisely where the mark lands. |
| Follow brush shape | On by default: the ring is traced from the tip the brush actually stamps, so a leaf brush shows a leaf and a spatter brush shows its specks — the same idea as Photoshop’s brush-tip cursor. The outline sits at half coverage (the part of the dab that reads), which is why a very soft tip draws a little smaller than its nominal size. Round and square tips keep their exact geometric outline either way; turn it off to get a plain circle for every brush. |
| Cursor colour & thickness | Draw the cursor in the colour you’re painting with instead of the neutral outline — much easier to follow on a busy canvas, and it previews the colour. Thickness (1–4 px) fixes the other common complaint: a hairline outline disappears against a textured canvas or a mid-grey wash. |
| Undo steps | How far back Undo and Redo can go — 5 to 1000 steps, 200 by default. Every step keeps the pixels it changed, so a long history on a big canvas costs memory: drop the number if you are working huge and want it back, raise it if you like undoing your way out of a long detour. Steps can still be dropped sooner once they add up to the engine’s memory budget (~192 MB), and lowering the setting discards the oldest steps straight away. Each step keeps only the pixels it actually changed, so a stroke through a big painting costs a fraction of its tiles. Under the setting, a live readout shows how many steps are held and how much memory they use, and a warning appears if memory, not your step count, has started dropping old steps. |
| Theme | View ▸ Light theme / Dark theme, remembered across sessions. |
| Tool dock layout | Drag to move, flip vertical/horizontal, and resize the column count — remembered. |
| Floating panels | The colour picker and Guides panel can be dragged out to float and stay open while you work; their positions persist. |
| Help | Press ? (or Help ▸ Shortcuts & gestures) for the in-app shortcut & gesture reference at any time. Its Manual button opens this guide in a new tab, so you can read it beside your drawing. |
Shortcuts & gestures
Keyboard
| B / E / G / V / S | Brush / Eraser / Fill / Move / Smudge. |
| E (hold) | Temporary eraser — springs back to your drawing tool on release. Tap it to latch instead. |
| H · Space (hold) | Pan tool · temporary pan with any tool (middle-mouse drag works too). |
| T | Text. |
| I · Alt+drag | Eyedropper tool (latched) · transient eyedropper from any tool. |
| M / L / W | Rect select / Lasso / Magic wand. |
| P / U | Pen (vector path) / Shape (line, ellipse, rectangle, polygon). |
| [ / ] | Brush size down / up. Brush, eraser and smudge each keep their own brush, size and opacity. |
| Shift+[ / Shift+] | Brush angle −15° / +15°: turns the tip, shown on the canvas while it changes. No effect on a round tip unless it has Roundness below 100% or an image tip. |
| F | Fill mode (silhouette) on/off. |
| X / D | Swap foreground and background colour · reset them to black on white. |
| Alt+Backspace / Ctrl+Backspace | Fill the selection (or layer) with the foreground · background colour. |
| Y / Shift+Y | Symmetry on/off · move symmetry axis. |
| Shift+R / Shift+G / Shift+D | Rulers on/off · edit guides (draw / move / angle) · measure. |
| Ctrl+Z / Ctrl+Shift+Z | Undo / Redo. |
| Ctrl+C / X / V | Copy / Cut / Paste (selection or layer). |
| Ctrl+A / Ctrl+D / Ctrl+Shift+I | Select all / Deselect / Invert. |
| + / − / 0 / 1 / 5 | Zoom in/out / fit / 100% / reset rotation. |
| Ctrl+[ / Ctrl+] | Rotate canvas ∓15°. |
| Ctrl+Shift+Alt+E | Merge visible → new layer (Stamp Visible). |
| Ctrl+Y | Grayscale value-check view. |
| Tab | Zen mode (hide UI). |
| Delete | Clear layer. |
| Ctrl + , | Settings — rebind shortcuts, brush ceiling, cursor style, undo depth. Edit ▸ Settings… opens the same dialog. |
| ? | Help / shortcut reference. |
Touch gestures (Procreate-style)
| One finger | Paint. |
| Two-finger drag / pinch | Pan / zoom / rotate. |
| Quick pinch-in | Fit to screen. |
| Two-finger tap | Undo (hold = repeat). |
| Three-finger tap | Redo. |
| Three-finger swipe down | Copy/paste pill: Cut · Copy · Duplicate · Paste (honours the selection: Duplicate copies it onto a new layer; Paste drops in as a new layer). |
| Touch & hold | Eyedropper (loupe). Suppressed under the Pan tool so a paused finger keeps panning. |
| Three-finger scrub | Clear layer. |
| Four-finger tap | Toggle UI (zen mode). |
Palm rejection ignores touches while a pen is active, so you can rest your hand on the screen while drawing with a stylus.